¶ Overview
Use a serial terminal program to communicate with the automated monitoring node (AMN) to set port configurations, test and debug sensors or communications issues.
¶ Getting Started
Tera Term needs to be installed on the computer (Windows only) before beginning. It is possible to use other terminal applications however to follow the guide you will need to download Tera Term from this link here. Follow the steps below to install:
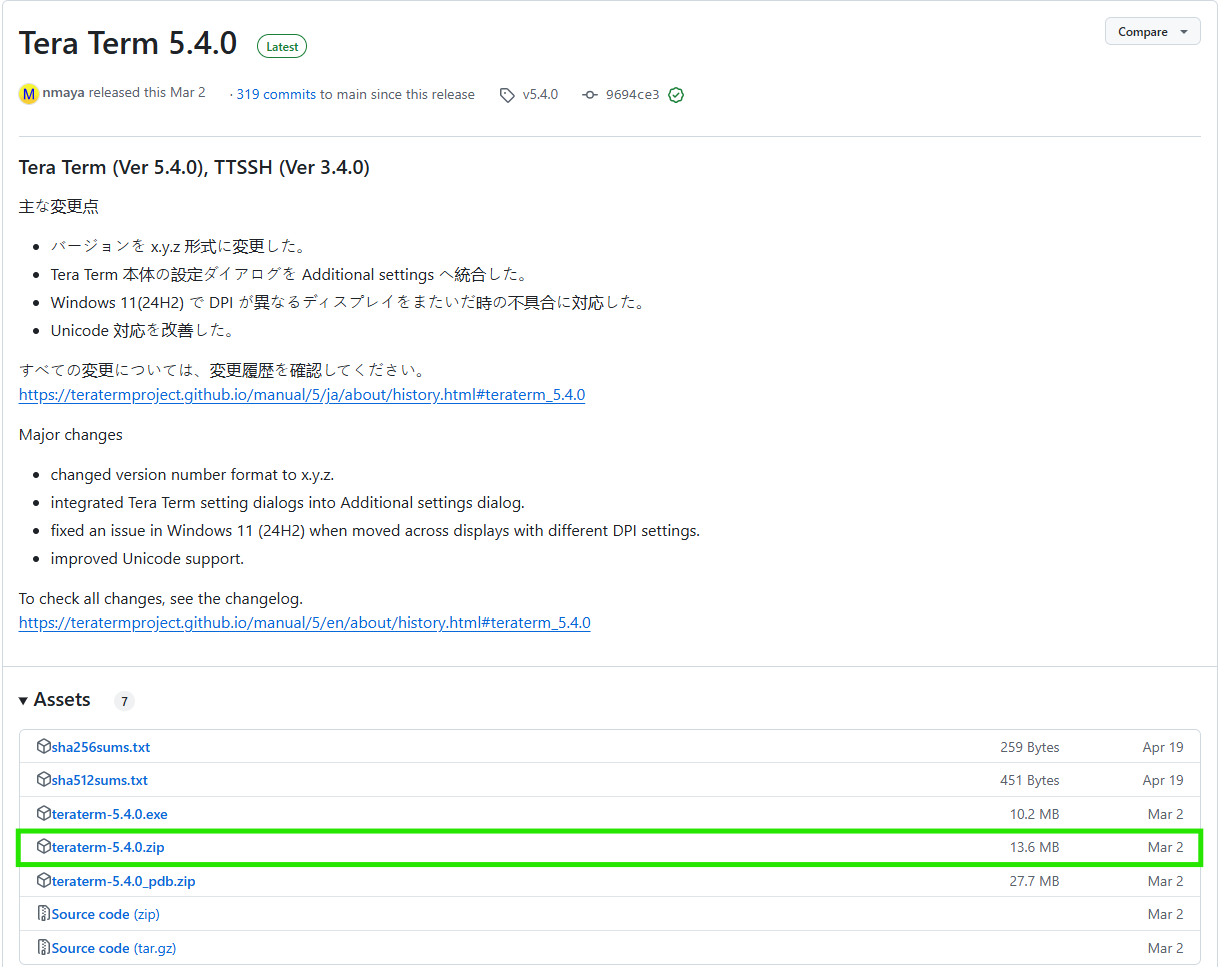
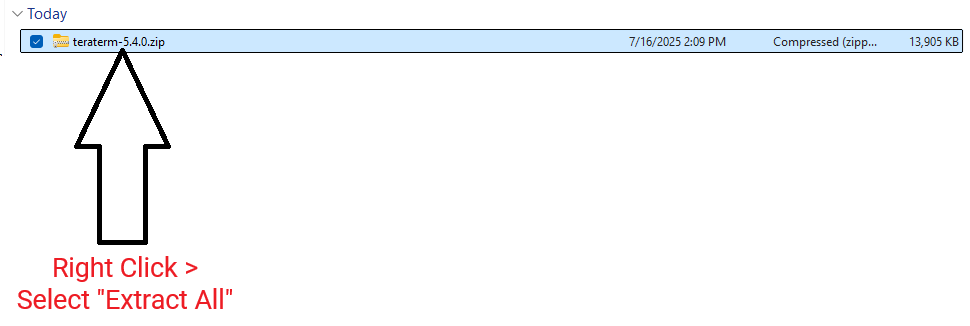
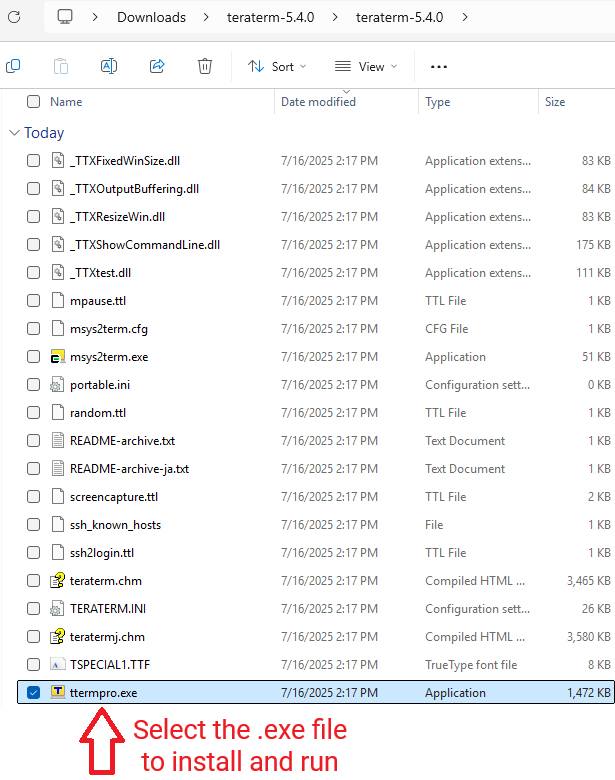
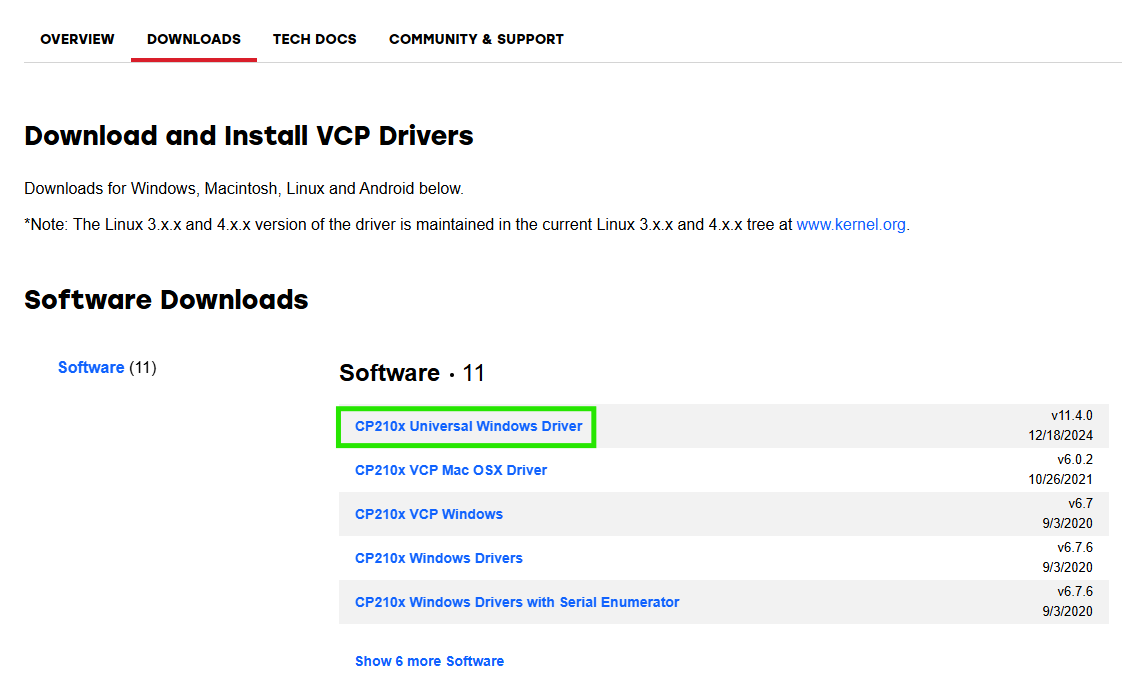
If you haven't downloaded and installed the USB driver yet you can download the driver here and follow the steps below.

You may be prompted to select a location for the extracted files.

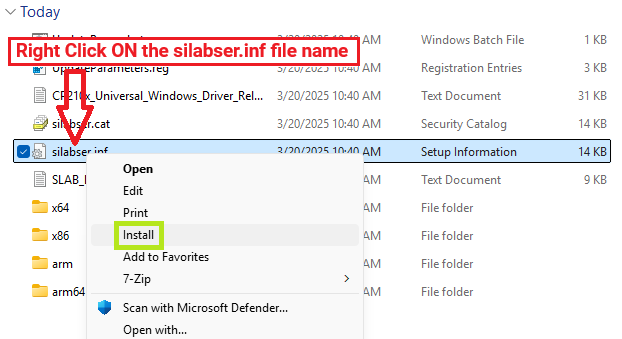
NOTE: If you right-click somewhere other than on the file name (such as on the date) of the file, you will not be given the option to select “Install”.
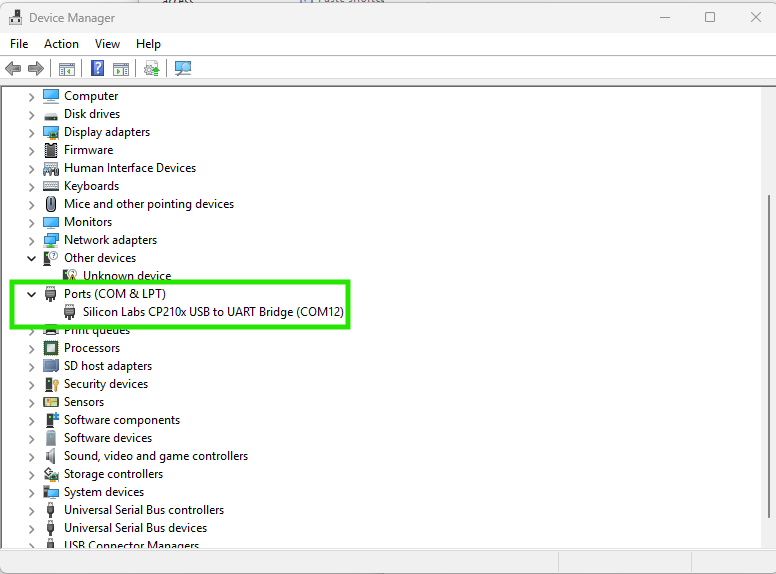
NOTE: Your COM port number may differ from the example above (COM12).
You will need a MicroUSB Cable that is capable of data transmission. Some MicroUSB Cables are for charging only.
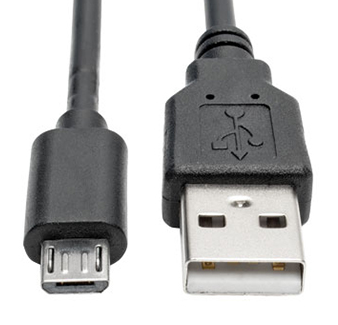
NOTE: Tera Term is only for Windows, if you are using an Apple machine, CoolTerm may be used and can be found here (version 2.2.1 or newer required). Contact neatMon Support for instructions on using CoolTerm.
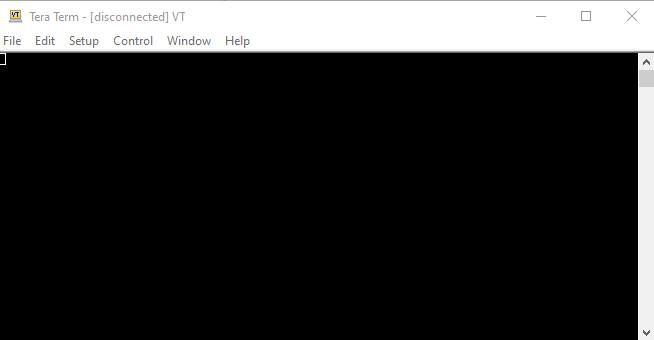
Once the Silicon Labs Drivers and Tera Term are installed run the Tera Term program. When Tera Term opens you should see the window in the image above.
¶ Getting Connected
¶ Connect to Node via MicroUSB
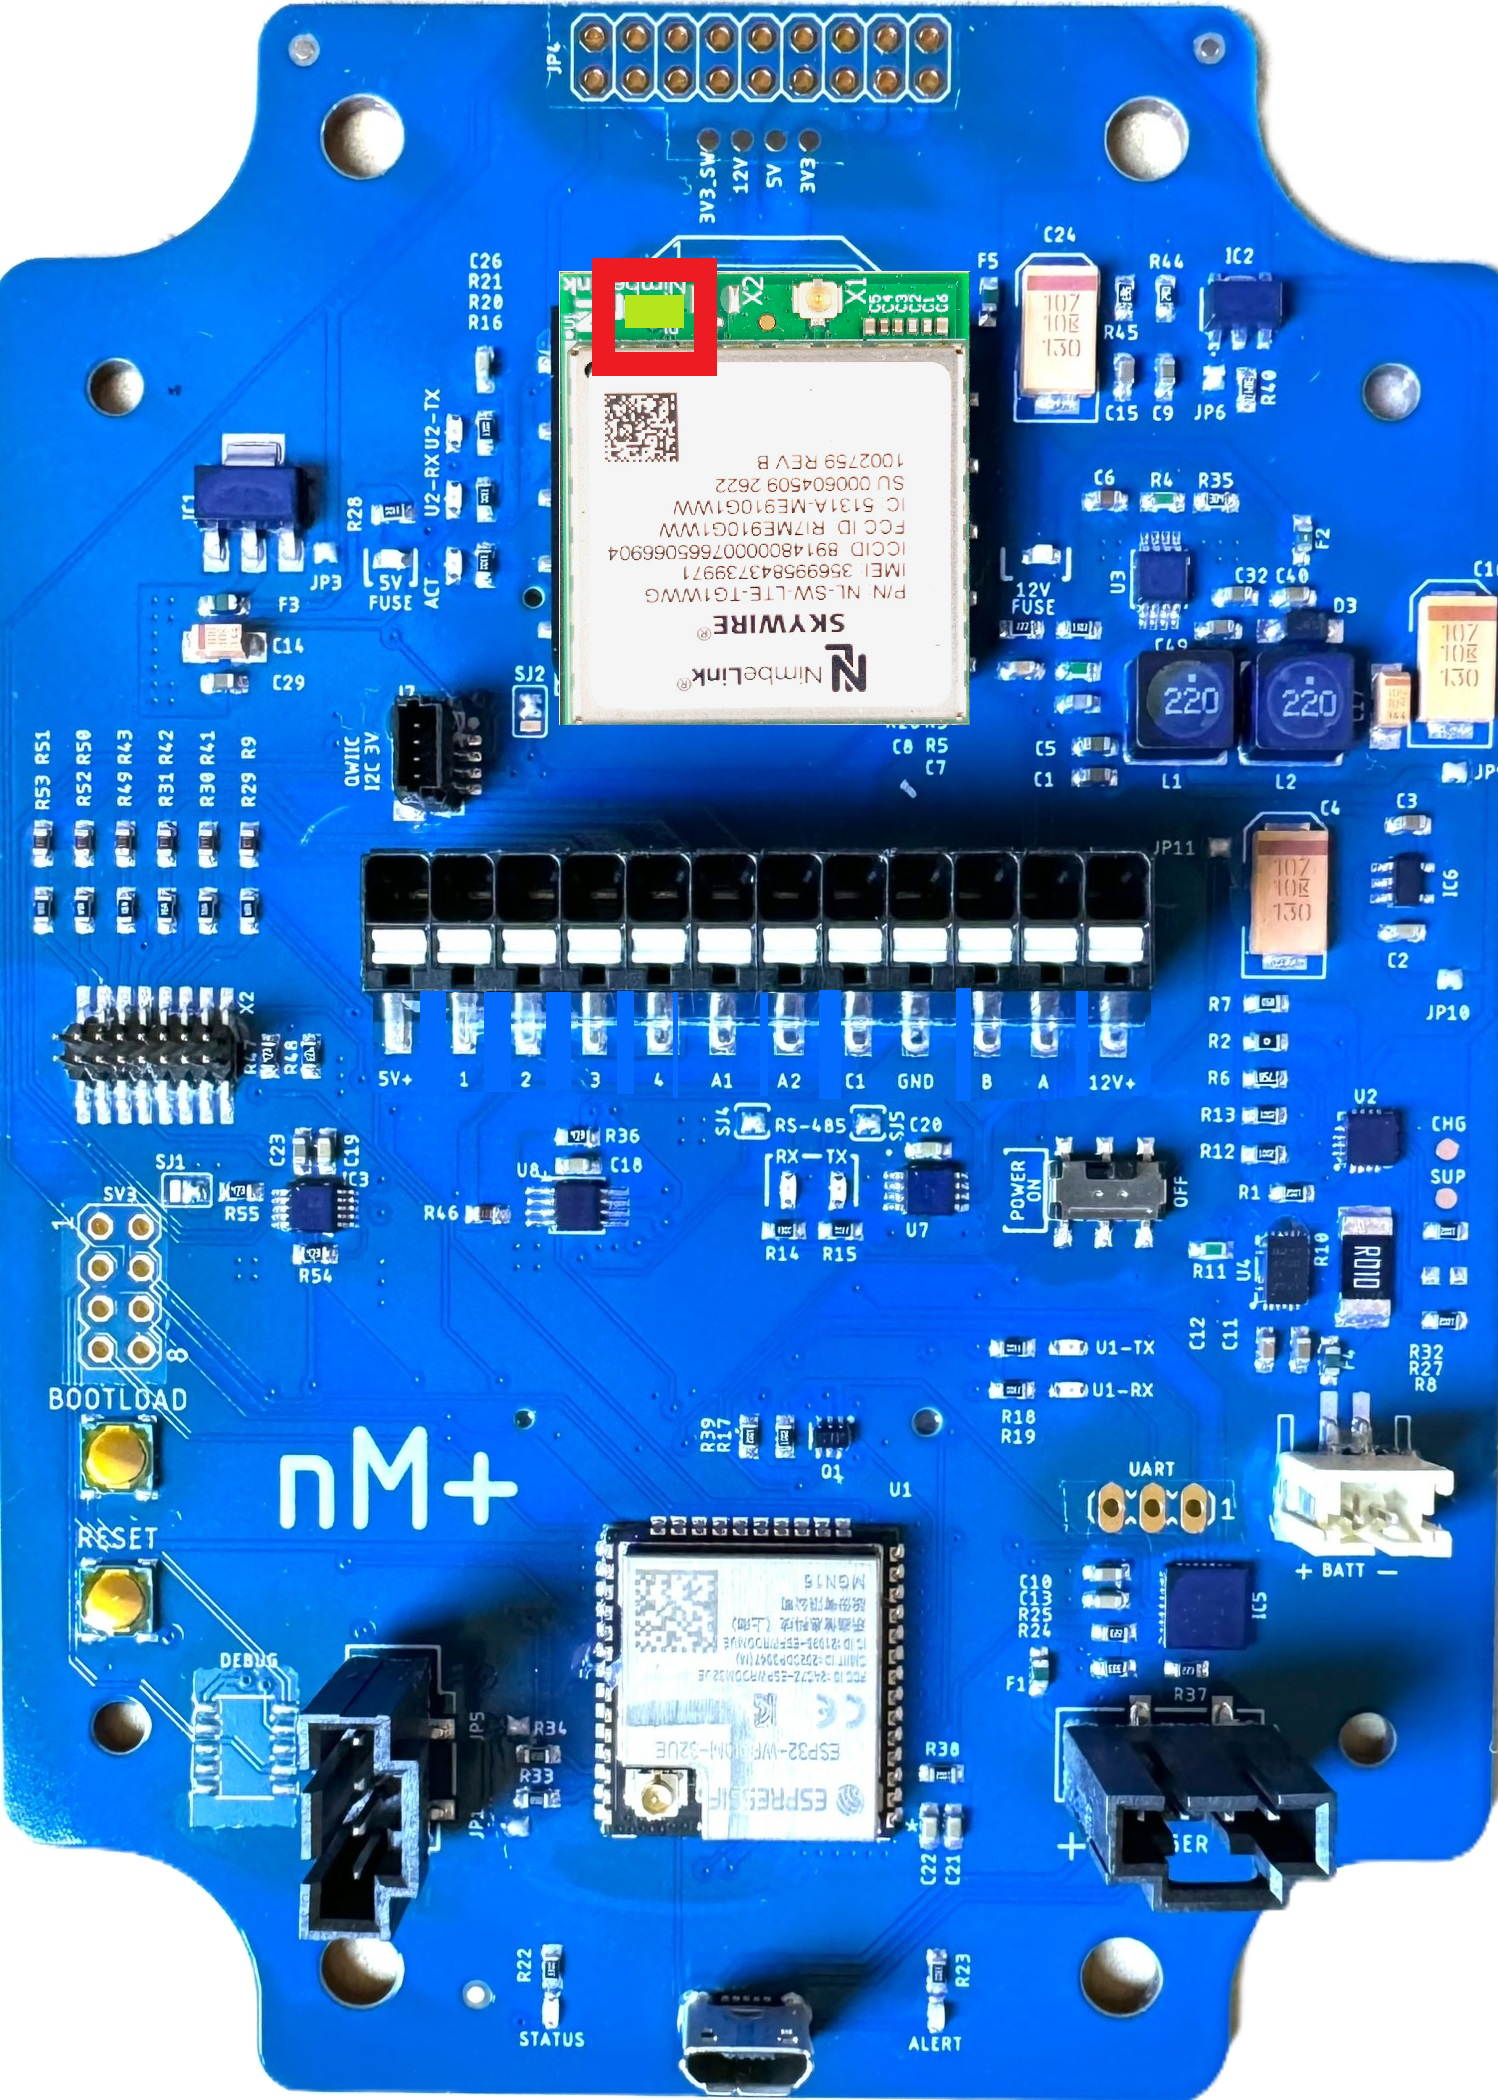
If you are connecting to a Cellular Node, ensure that the Modem LED light is NOT blinking prior to connecting to the MicroUSB Port. Connecting to the MicroUSB port will power cycle the node and modem, and may corrupt the modem firmware if it is power cycled while the Modem LED light is blinking (indicating an active connection to a cellular network).
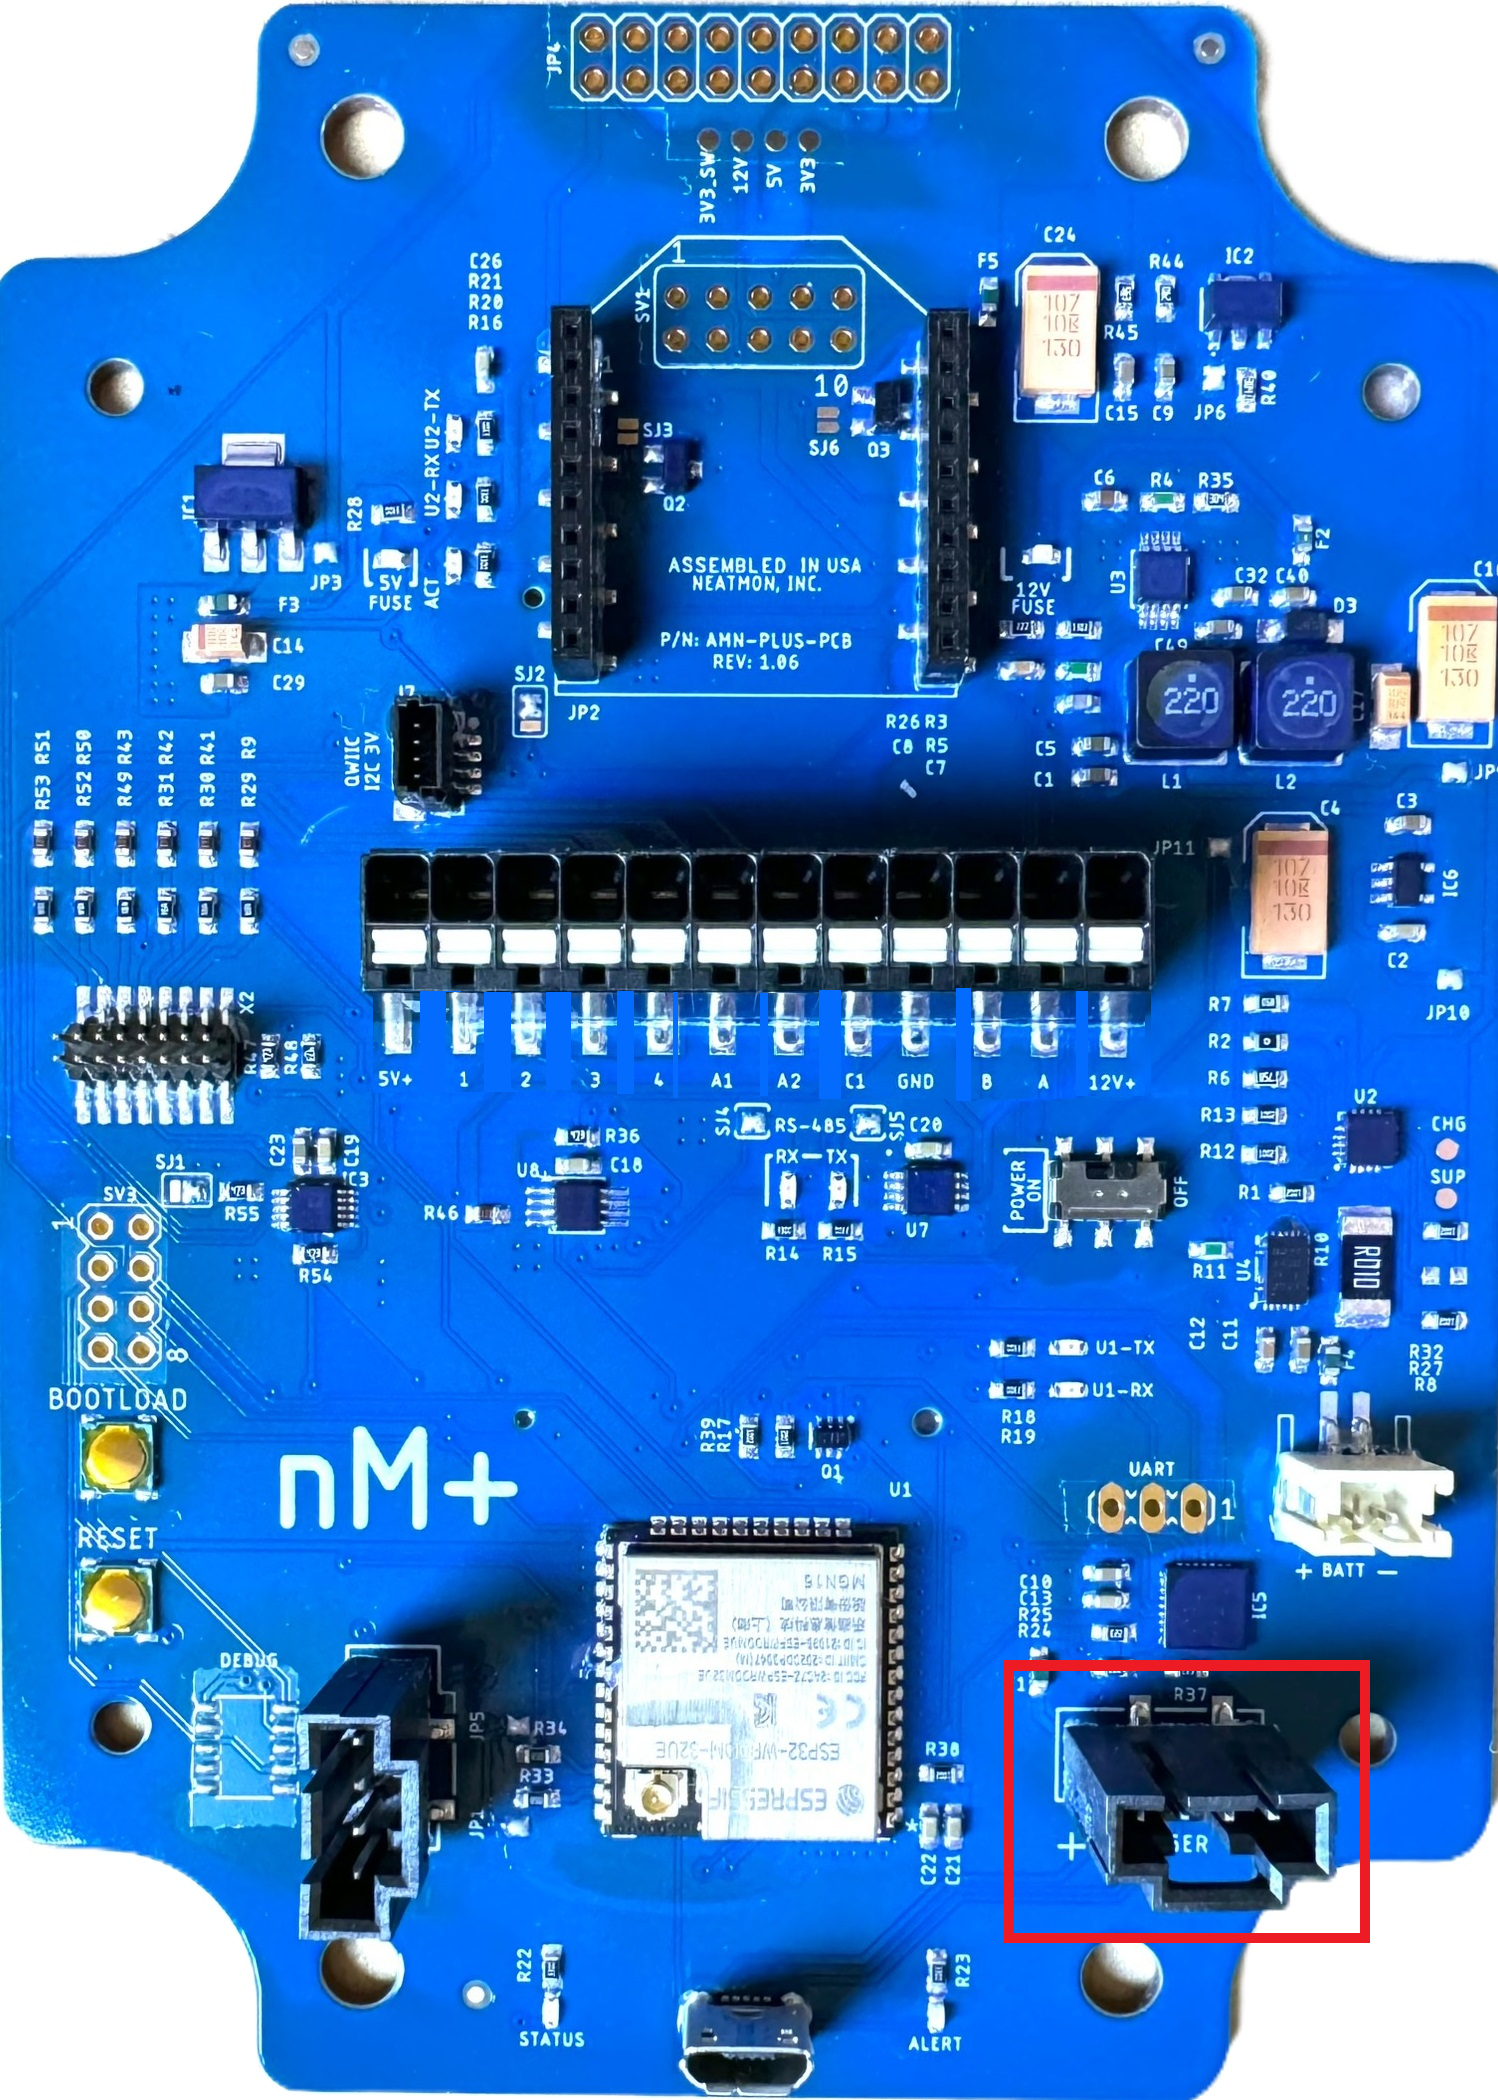
Unplug Solar Panel or External Power from the Charger Port prior to plugging in the MicroUSB cable. If the Charger Port has power coming into it, it may back feed your computer, causing it to crash or creating issues with opening the serial port.
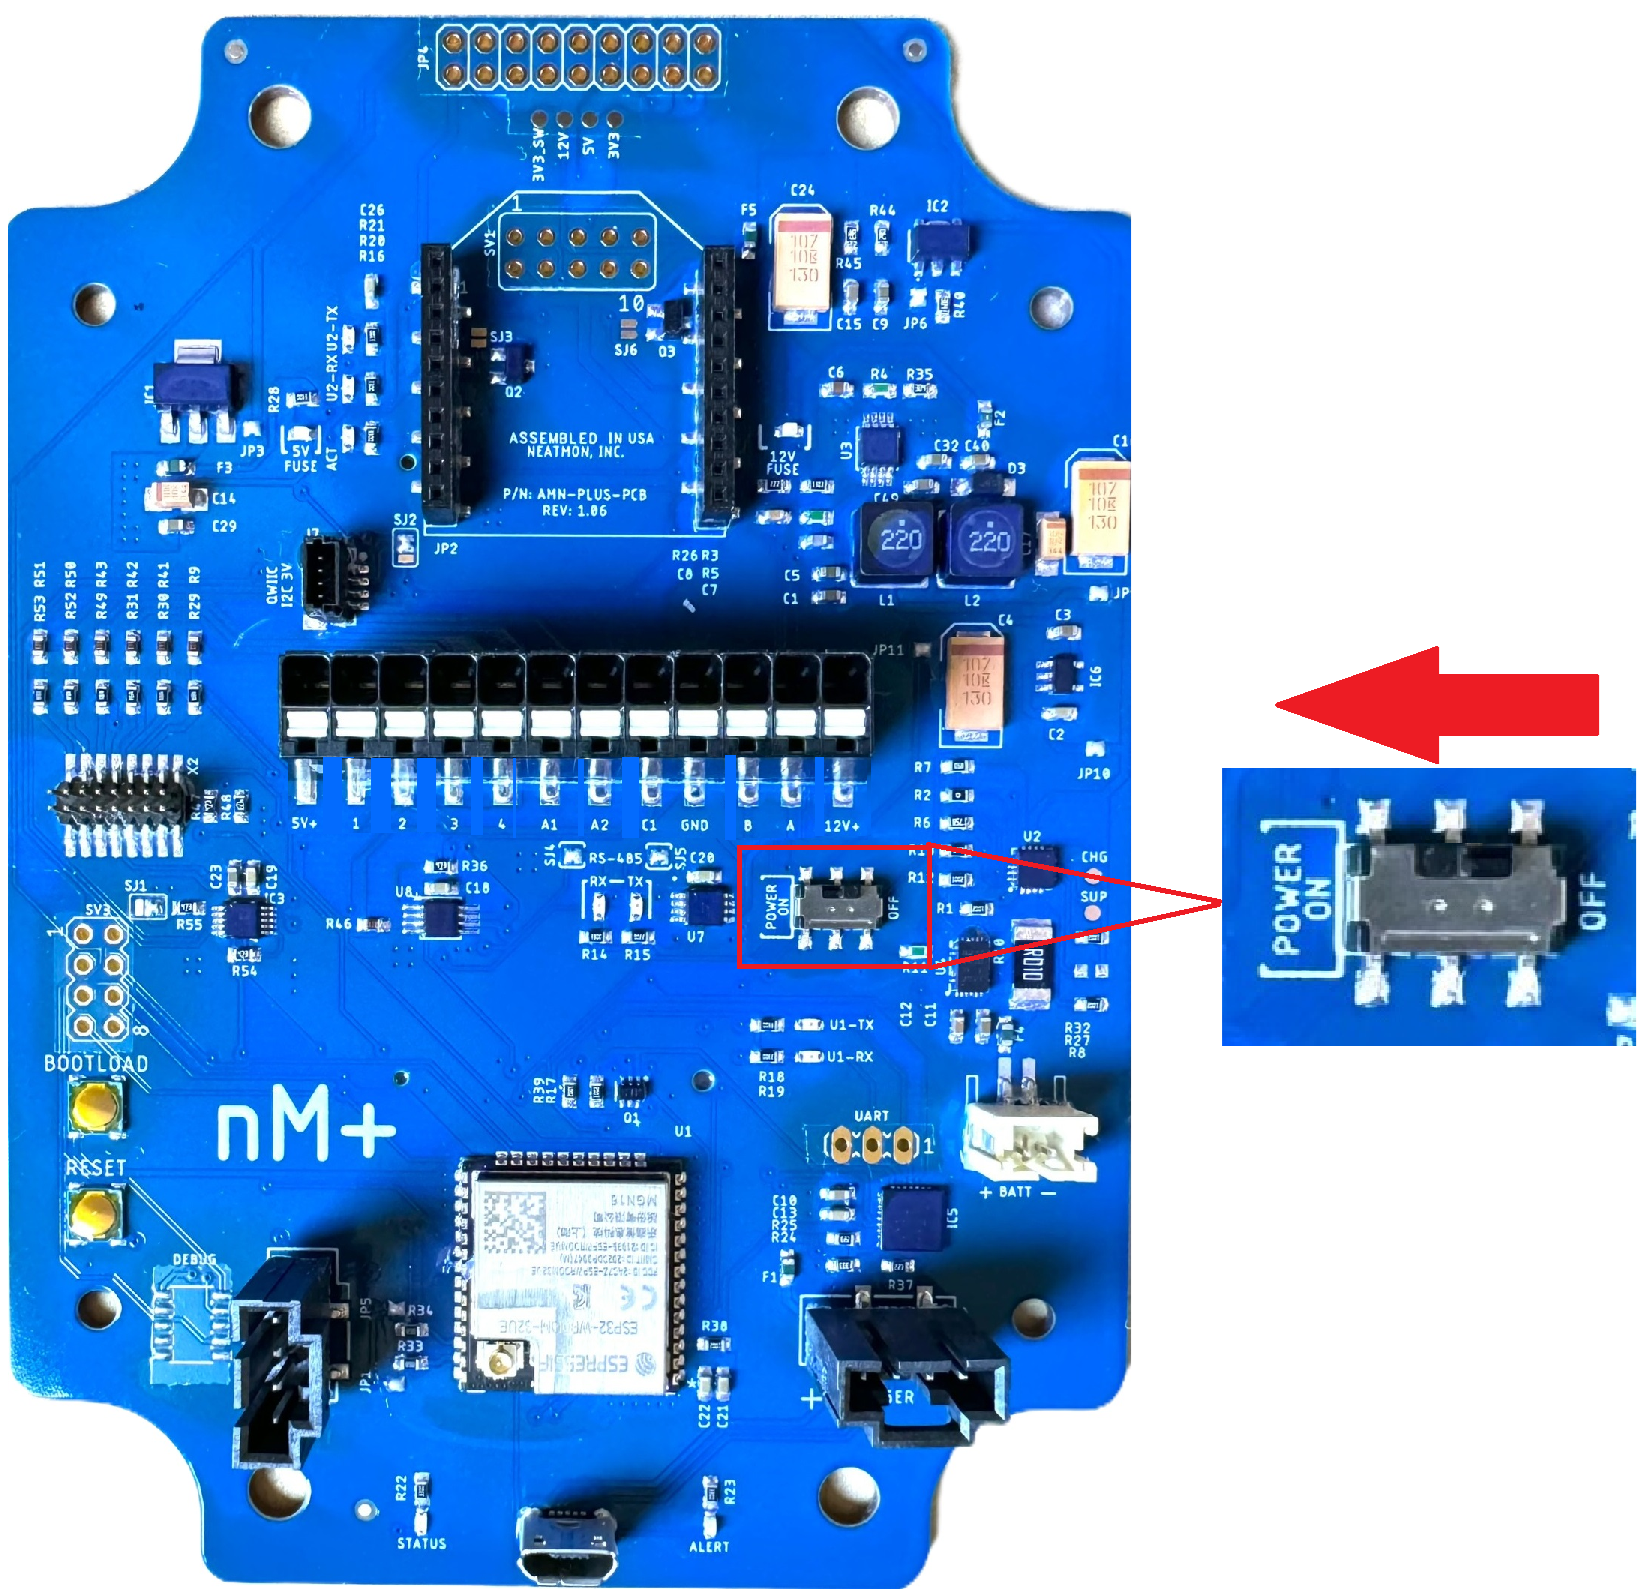
If connecting to a Cellular Node, ensure that the power switch is set to POWER ON. This switch only turns off power to the Node from the battery. The USB connection will supply power to the node. WiFi nodes may be connected to and configured with this switch off, however a Cellular Node may enter a reboot cycle with this switch turned off.
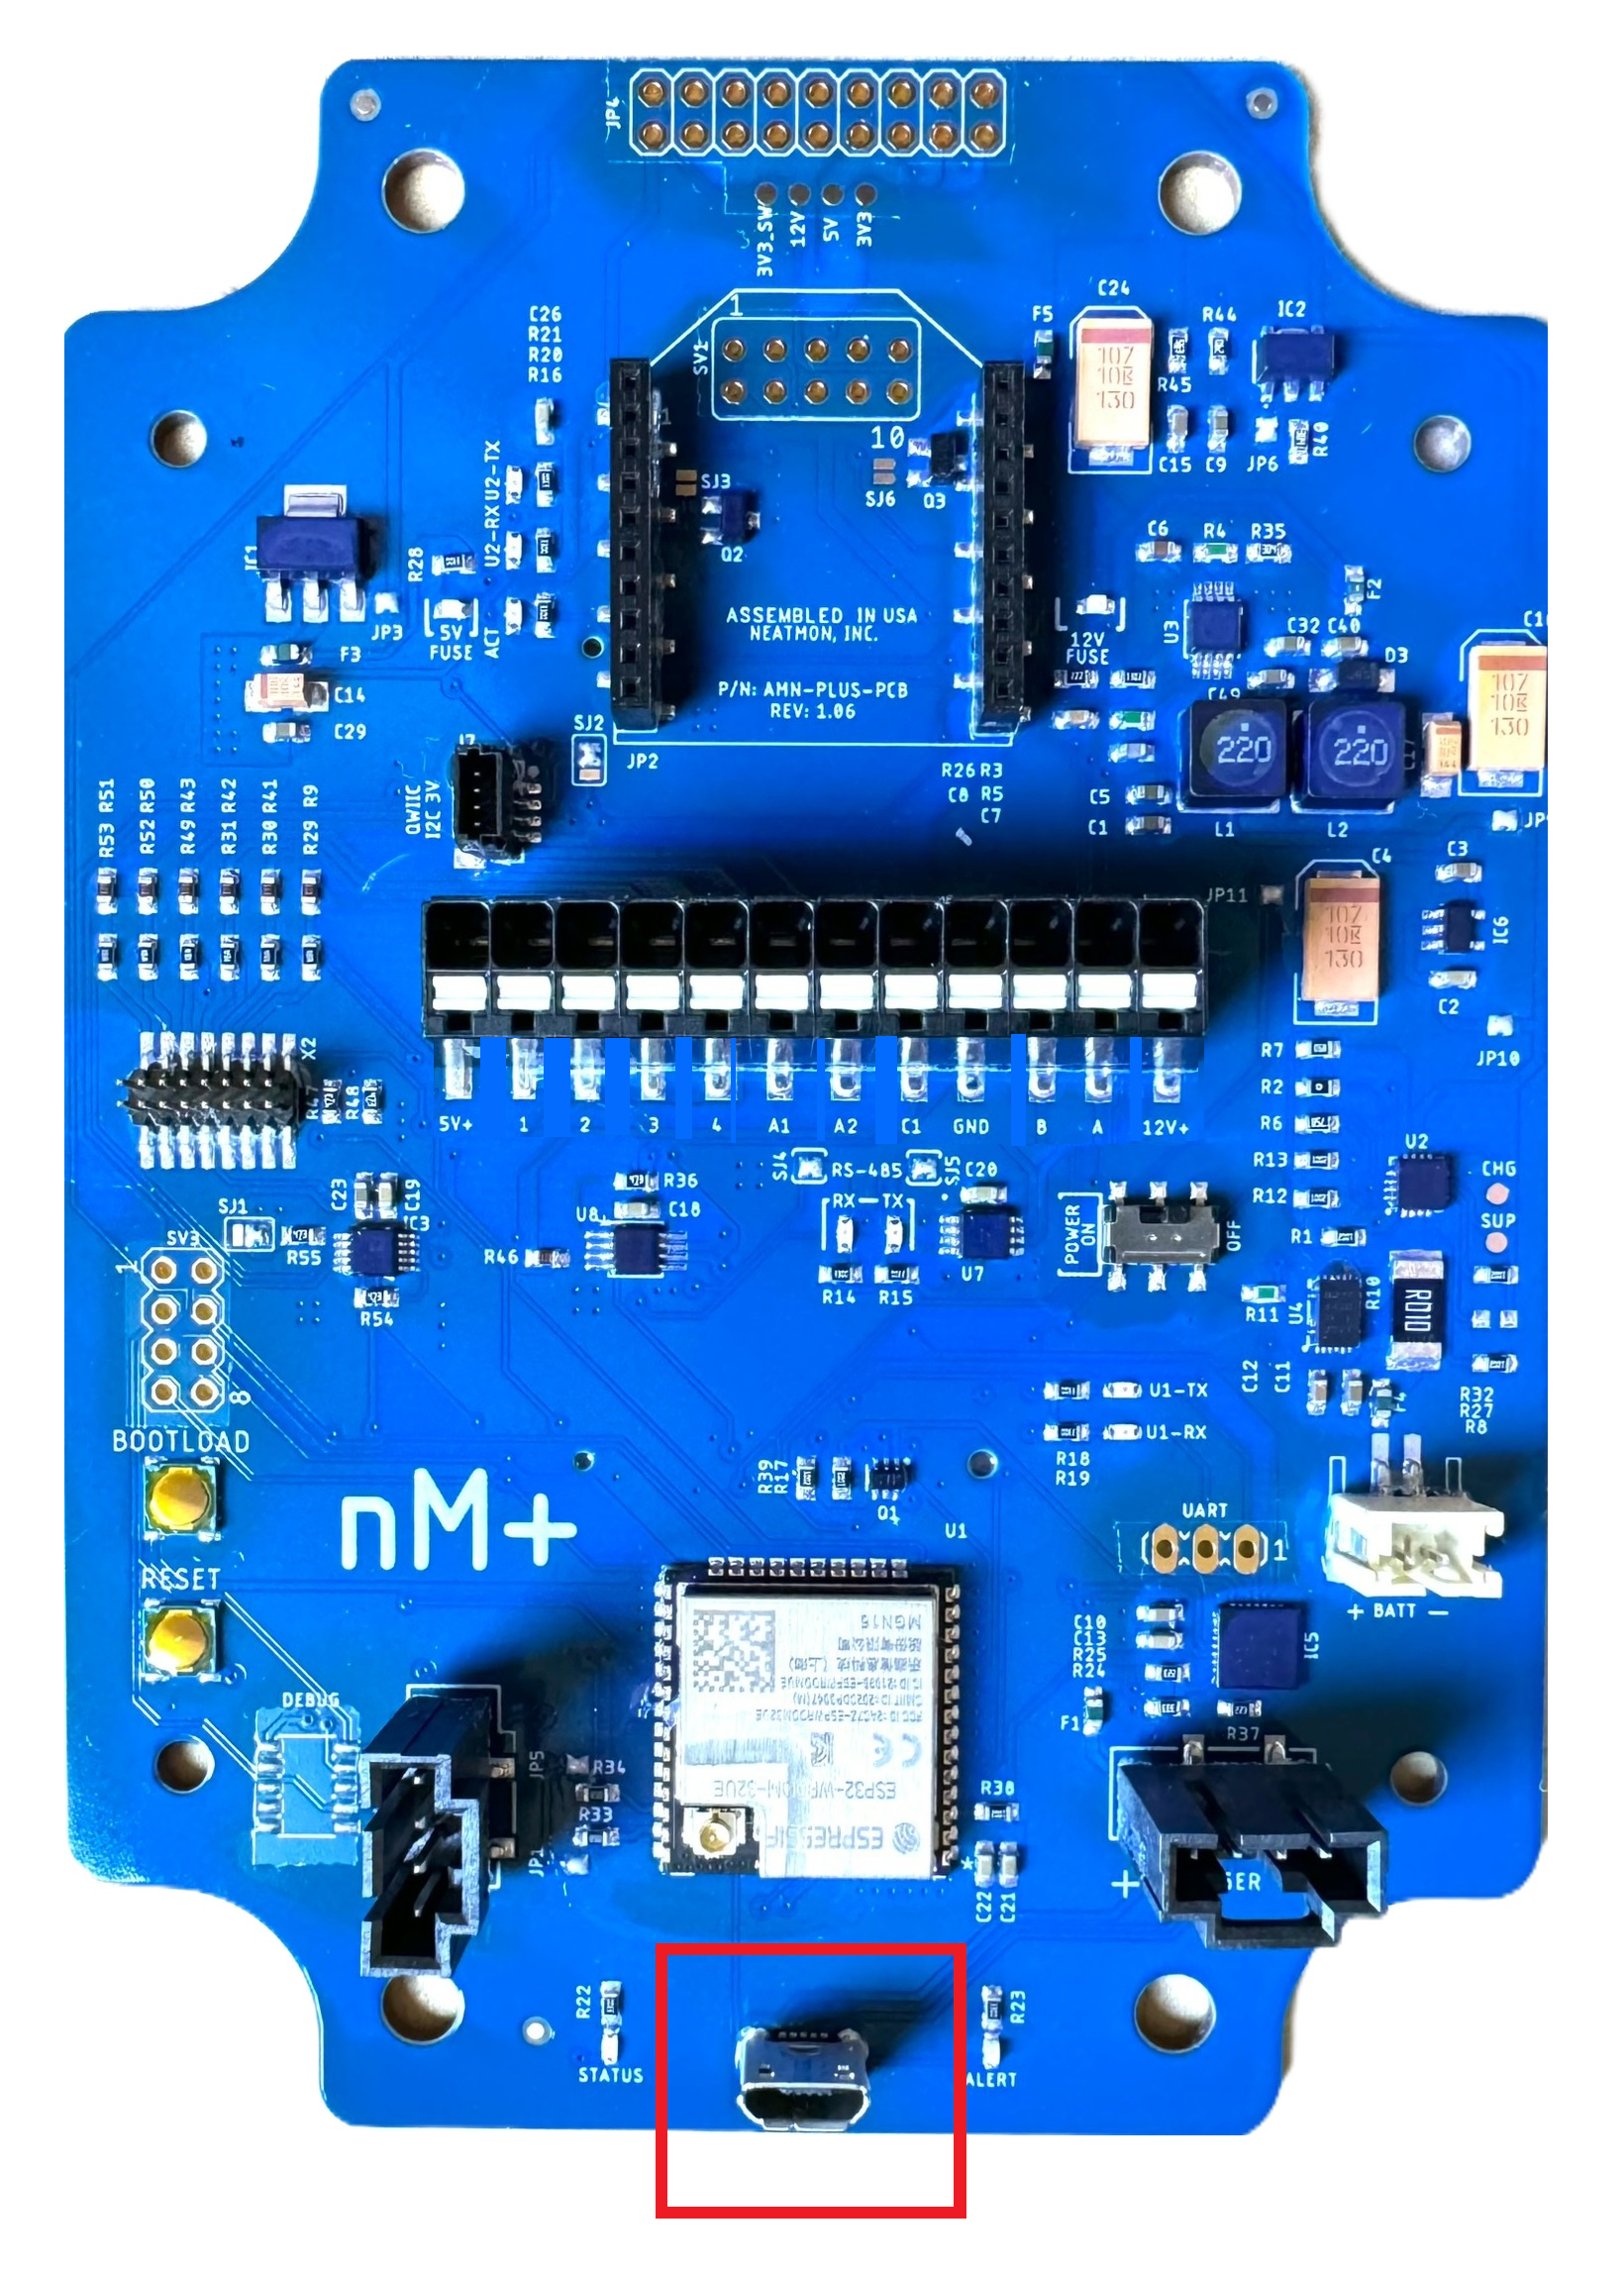
Connect the MicroUSB cable from your computer to the MicroUSB Socket on the neatMon node.
NOTE: Reminder- wait for the Modem LED light to stop flashing before connecting if you are connecting to a Cellular Node.
¶ Set Tera Term Settings
NOTE: These settings can be saved (see below). If you already have these settings saved, skip to Enable Logging below.

Select the “Setup” drop-down menu and click on “Serial port”.

Select the “Speed” drop-down menu and click on “115200”. The example above shows “COM135” as the selected port. The “Port” setting does not matter at this stage.
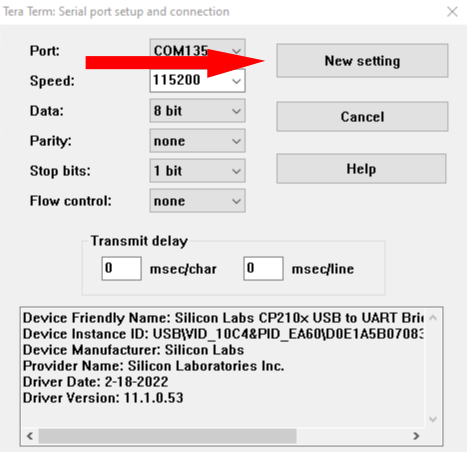
Select “New setting”.
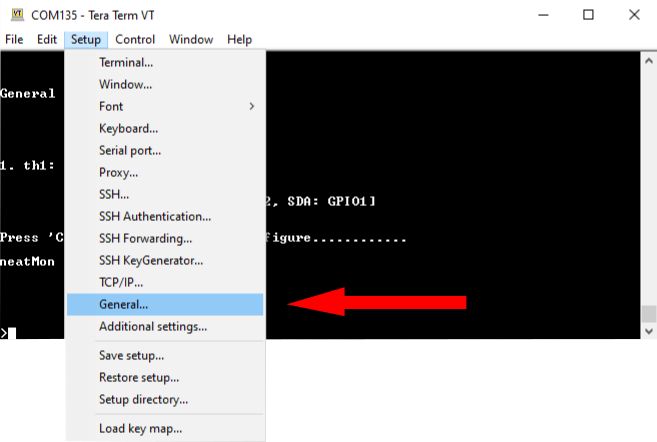
Select the “Setup” drop-down menu and click “General”.
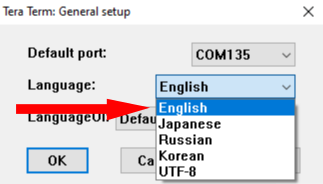
Select the “Language” drop-down and click “English”.
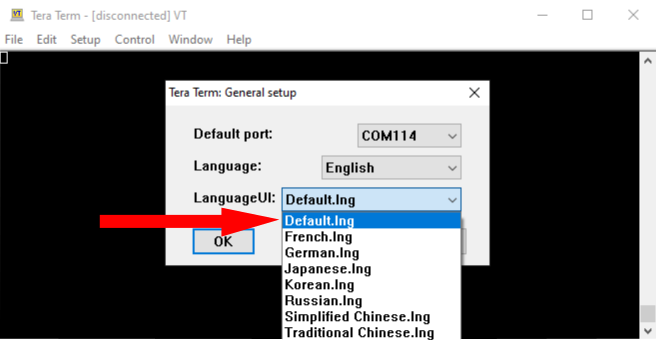
Select the “LanguageUI” drop-down and click “Default.Ing”
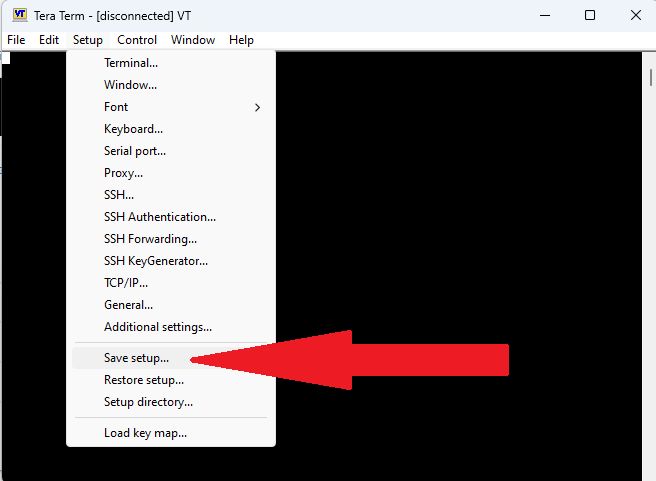
Select the “Setup” drop-down menu and Click “Save setup…”, save the setup file.
¶ Enable Logging
NOTE: This step is optional, and not required for connecting to the Node, but is recommended for record keeping and troubleshooting purposes.
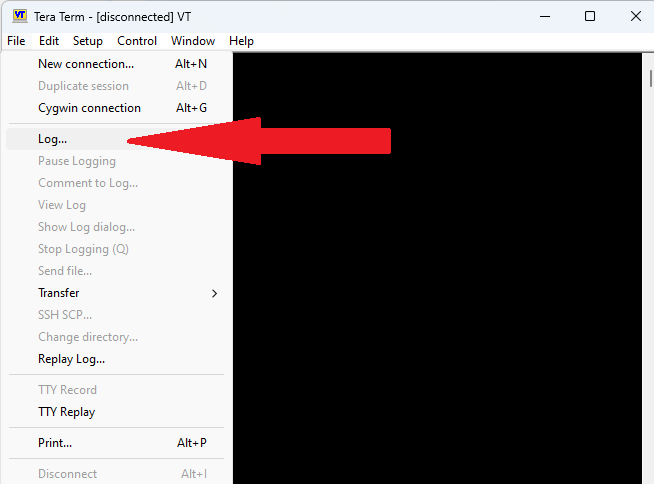
Select the File drop-down menu and click Log…
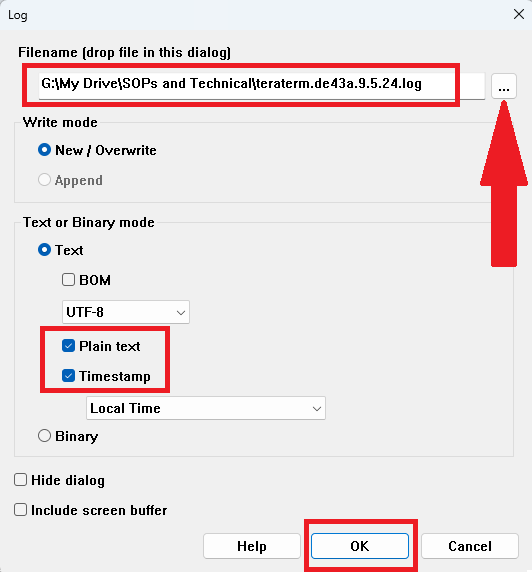
On the Log screen, click the "…" icon to select a file location, edit the name of the file (nM recommends last 5 of GUID and date, as shown above), select Plain text and Timestamp boxes, and click OK.

A .txt log file will be created in the file location you chose. The log is updated in real-time with the matching output from Tera Term. This file can be referenced later or sent to nM support for troubleshooting purposes.
¶ Open Serial Port
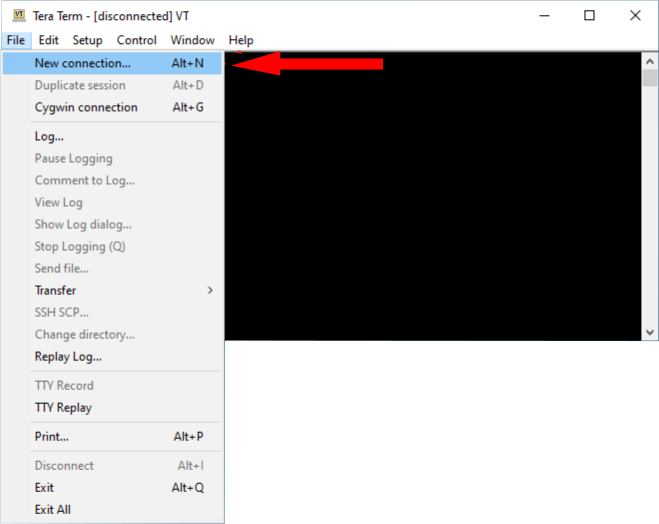
Select the “File” drop-down menu and click on New connection..
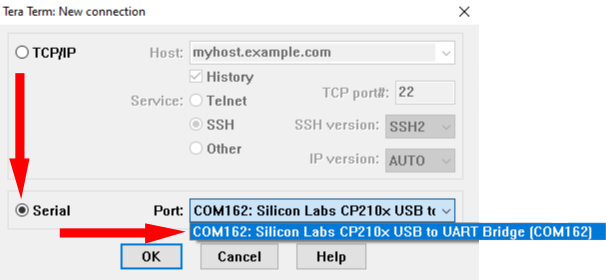
Select the Serial option and then use the drop-down menu to identify and click on the COM port that your AMN is using.
NOTE: The COM (communication) port that your AMN is using may differ from the one shown. If you are not seeing a Silicon Labs CP210x USB to UART Bridge option, check that you have downloaded and installed the driver correctly.
NOTE: If you do not see a "Silicon Labs 210x… (COM)" option, please check that your MicroUSB cable is data+charge cable, and not a charge-only cable. Next, open the Device Manager on your PC and follow the instructions at the beginning of this guide to check if the COM port is showing there. Lastly, attempt to install the driver again by following the instructions at the beginning of this guide.

Select OK.
NOTE: Selecting OK will power cycle the node. Wait for the Modem LED light to stop flashing before selecting OK if you are connecting to a Cellular Node.
¶ Getting Prompt
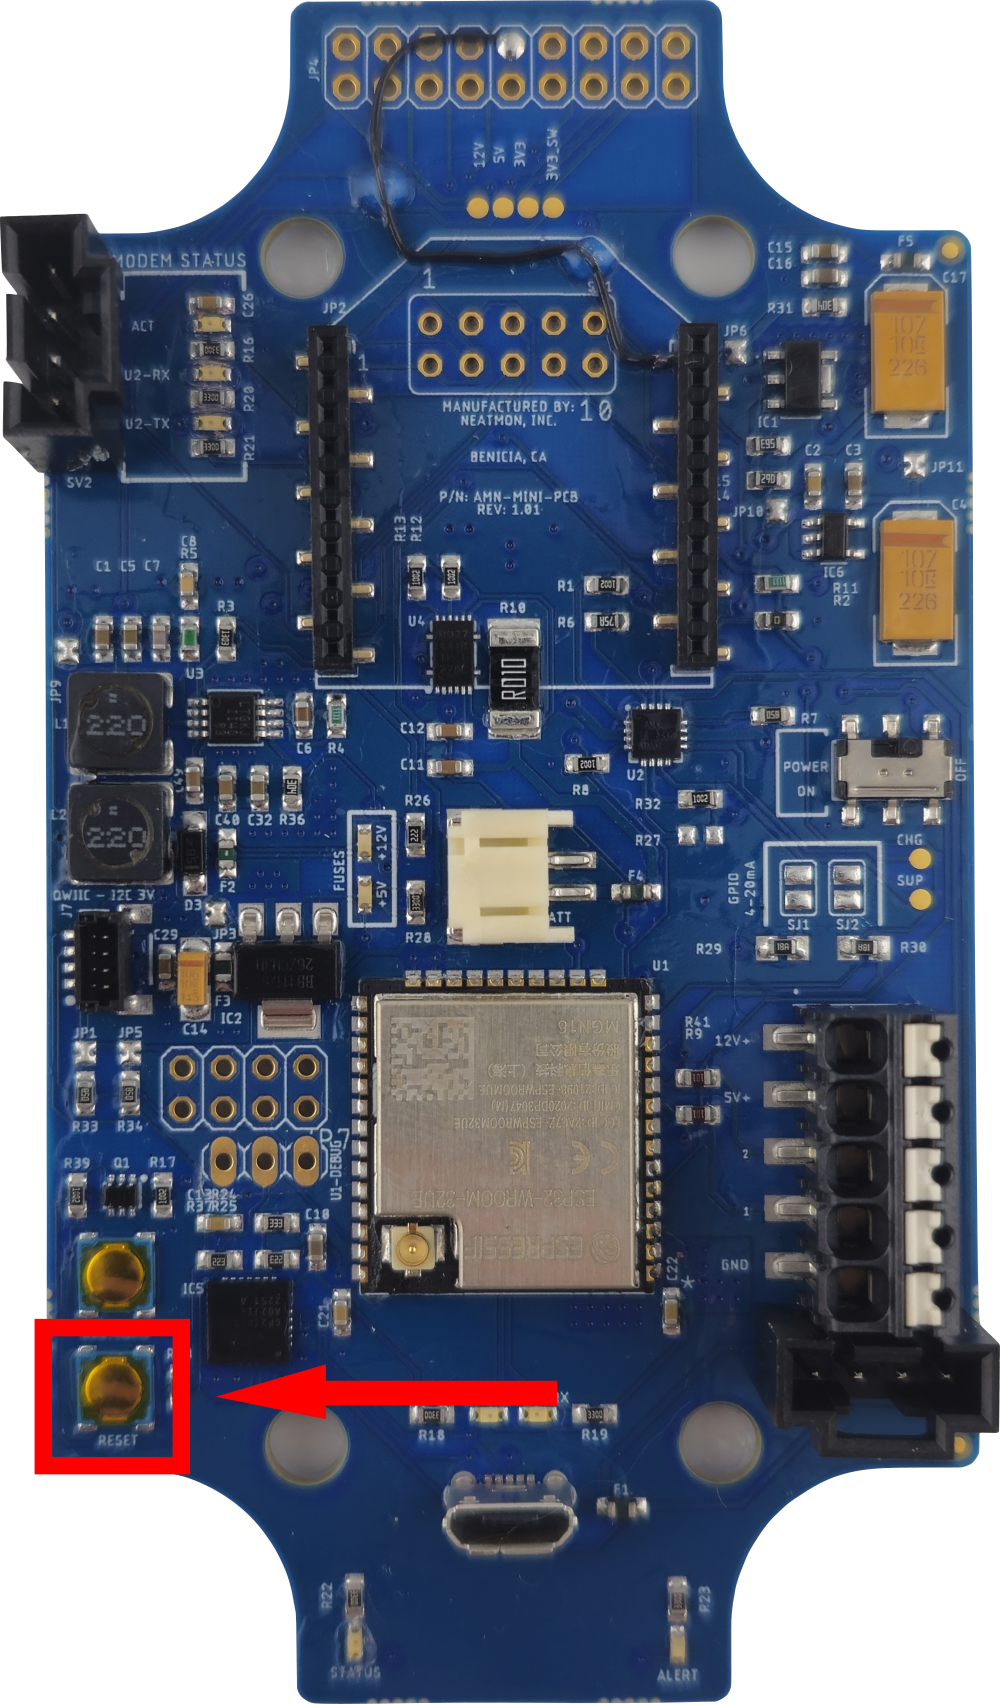

The startup screen below should appear after opening the port in the previous step, allowing for the option to enter “C” to enter the neatMon Main menu before initializing the node. If you miss the “C” prompt or it does not appear, locate the button on the Node labeled RESET and press it to power cycle the node and allow for pressing “C". Both the AMN-MINI and AMN-PLUS reset button locations are pictured above.
NOTE: Do not hit the reset button if the modem LED light is flashing if you are connecting to a Cellular Node.
ets Jul 29 2019 12:21:46

rst:0x1 (POWERON_RESET),boot:0x13 (SPI_FAST_FLASH_BOOT)
configsip: 0, SPIWP:0xee
clk_drv:0x00,q_drv:0x00,d_drv:0x00,cs0_drv:0x00,hd_drv:0x00,wp_drv:0x00
mode:DIO, clock div:2
load:0x3fff0030,len:1184
load:0x40078000,len:12784
load:0x40080400,len:3032
entry 0x400805e4
WiFi debugging not yet implemented.
Reading 0 saved sensor configurations...


--------------------------------------

        Automated Monitoring Node
        by neatMon, Inc.
        FW: 1.78, HW: 1.01

--------------------------------------

GUID:

Network config
  Server:
  Path:
  Port: 65535
  SSID: YOUR_SSID
  Password: YOUR_PASSWORD
  Sync rate: 65535m

Battery monitor: enabled
Demo mode: true
Num sensors: 0

Press 'C' to stop booting and configure.......

NeatMon Main Menu
        1: Network config
        2: Sensor config
        3: Utilities
        x: < Save & Quit

>Once the reset button is pressed on the AMN a message will appear in the terminal window saying 'Press 'C' to stop booting and configure.......'. When that message appears press c on the keyboard. If too much time has passed after pressing the reset button, the AMN will begin normal operation and the option to enter the main menu will not be available. To regain the option to enter the main menu, press the reset button once again.
NOTE: Info related to navigating the menu is located in the Firmware Command Reference.
¶ Disconnecting
If you have made any changes to configurations while connected, but sure to save your settings. Instructions on saving settings can be found in the Utility Menu Reference guide.

Remove the MicroUSB cable from the MicroUSB Socket.
NOTE: Do not disconnect the MicroUSB if the modem LED light is flashing if you are connected to a Cellular Node.

If putting the node into service, ensure the Power Switch is turned to “POWER ON”.

If putting the node into service, plug the solar panel or external power supply back in to the Charge Port.

If putting the node into service, hit the RESET button. After pushing the RESET button, the node will reboot and enter it's normal functions. If it is a cellular node, it will search for GPS location after hitting the reboot button and locate the node accordingly on the neatMon HUB Map View.
NOTE: Do not hit the reset button if the modem LED light is flashing if you are connecting to a Cellular Node.