¶ Overview
When new features are needed a firmware update can add functionality. Newer firmware may be updated using the Over-The-Air function in the online software, or in some cases by cable as this guide describes.
¶ Getting Started
First, If you haven't downloaded the USB driver yet please do so by following the instructions in the Opening Serial Terminal guide here at this link.
You will also need the new updated firmware files that you plan on flashing to the AMN which can be downloaded from our GitHub Repo here at this link.
Flash Download Tool will also need to be installed and you can download that from this link. Once downloaded, extract the files and run the application.
¶ Connecting to AMN
Plug the AMN into the computer using a micro USB cord.
NOTE: The microUSB cable must have the ability to transmit data. Some microUSB cables are charge-only.
¶ Configure Flash Download Tool
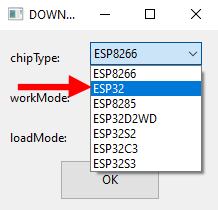
Select the chipType drop-down menu then click ESP32.

Select the workMode drop-down menu and click develop.
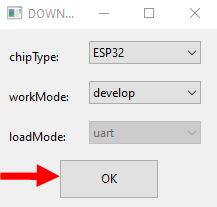
Select OK.
¶ Memory Address Configuration
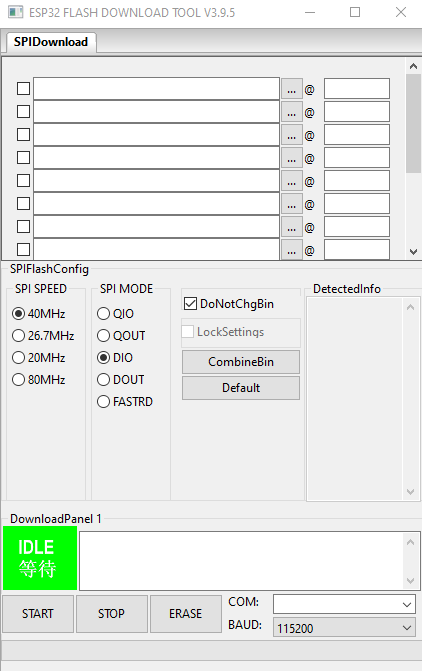
This is the default view before any addresses have been configured.

Set the location of your flashing files by clicking the square with the three dots and using the file explorer to locate the files. The table below shows the file name and corresponding memory address as it should be entered.
NOTE: These are the files you downloaded earlier from here. The number following the amn-x-firmware file will differ depending on the current software version.
| Description | Filename | Memory Address (0x) |
| Firmware | amn-x-firmware-vyyy.bin | 10000 |
| Bootloader | bootloader_dio_40m.bin | 1000 |
| Partitions | partitions.bin | 8000 |

Use the above memory addresses for each file as shown in the picture.

Configure your settings to match the ones shown above.
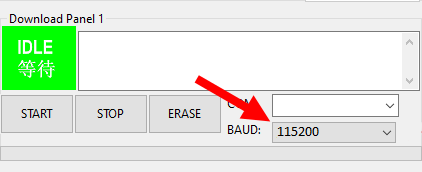
Select the BAUD dropdown list and click 115200.
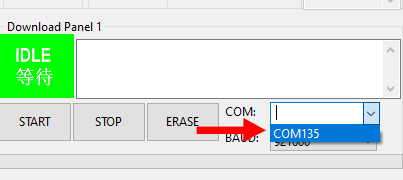
Select the COM drop-down menu and click the COM port that corresponds to the AMN.
NOTE: The COM port number that your AMN uses may differ from the one shown. If nothing appears in the drop-down menu unplug and plug back in the AMN.
¶ Flashing

Select START.
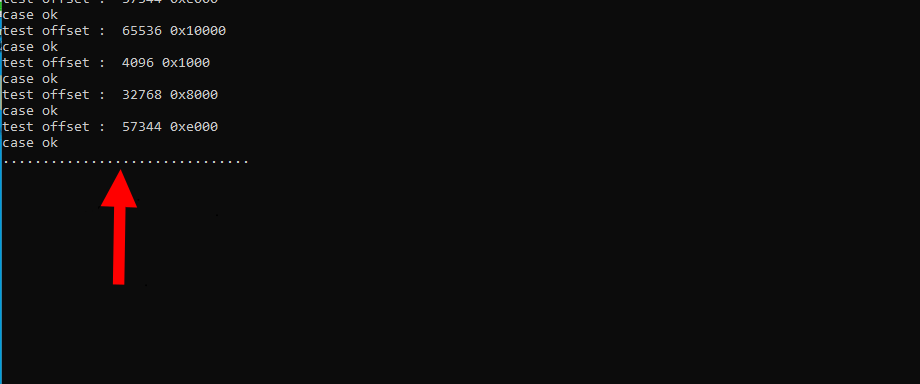
Navigate to the console window that opens alongside Flash Download Tool. Once the start button is pressed in the last step, the dots pictured below should start to appear in the console window.
NOTE: If you do not see the dots in your console window after pressing start, close Flash Download Tool along with any other conflicting programs such as Tera Term. Then, reopen Flash Download Tool and try again.
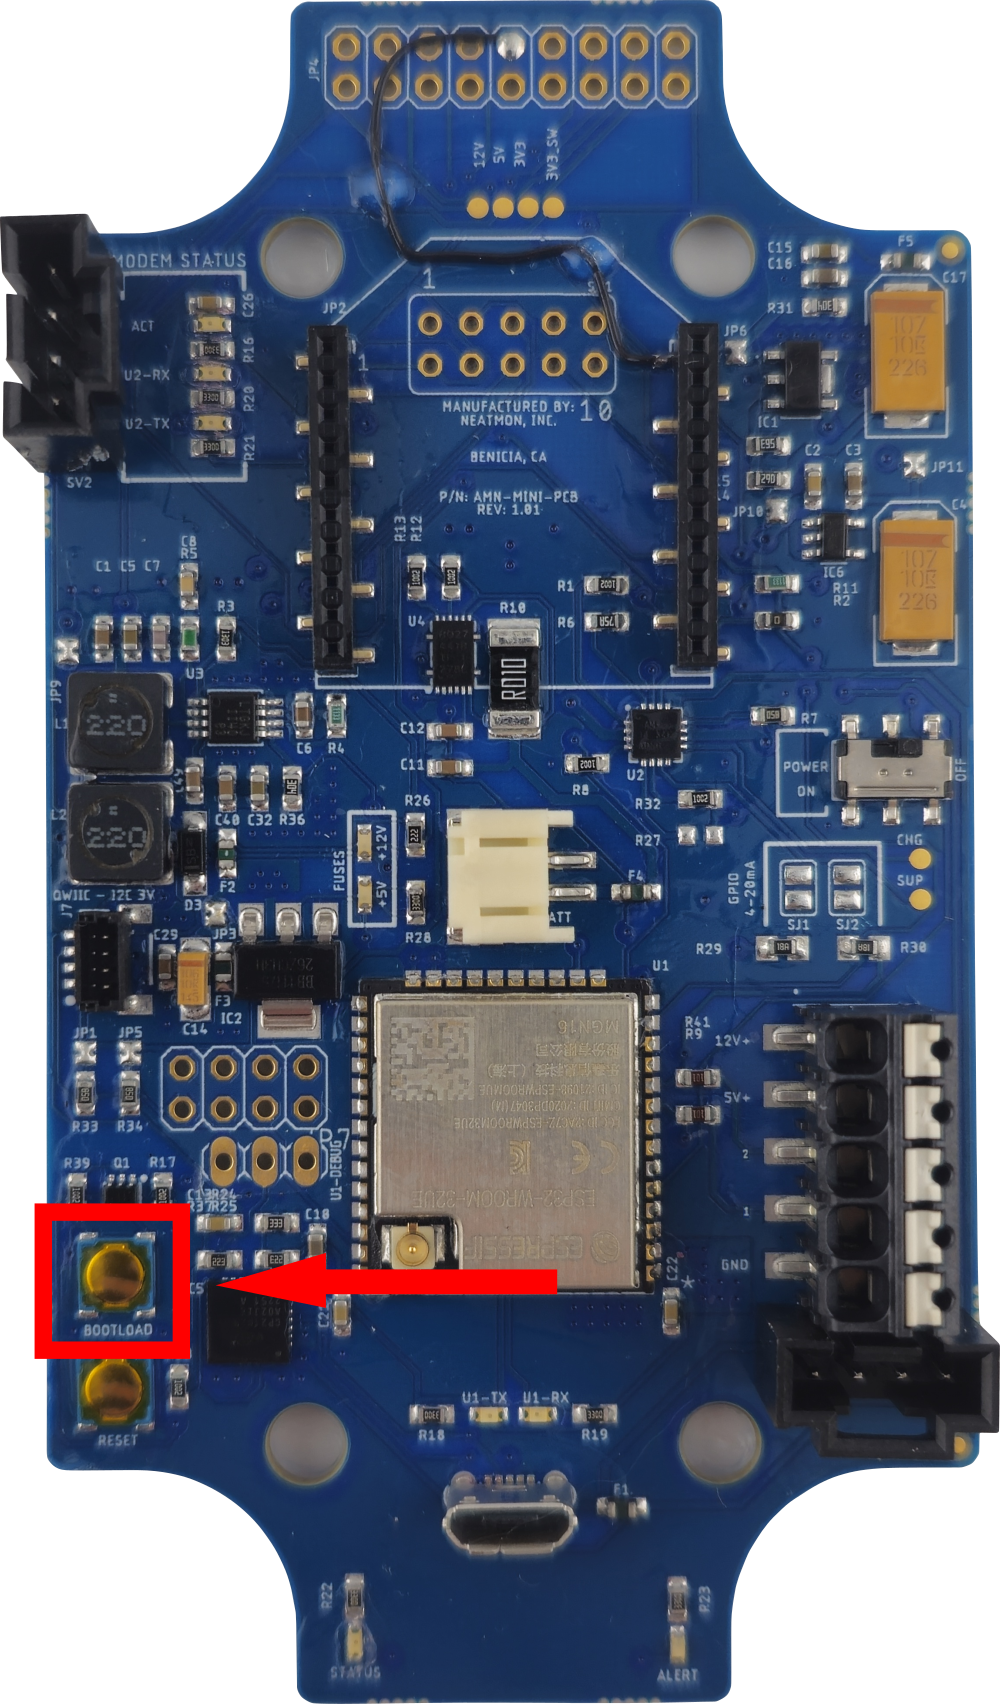

Once the dots appear in the console window, press and hold the BOOTLOAD button on the AMN. In some scenarios, this step is not necessary and the flashing will begin automatically.

Stop holding the bootload button when Uploading stub appears in the terminal.
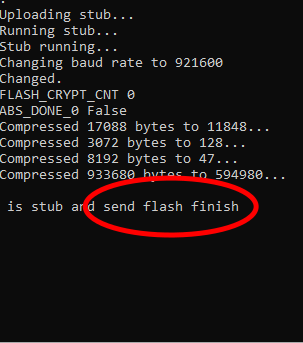
Wait until you see send flash finish appear in the terminal window.

Press the stop button to finish.
neatMon recommends resetting to defaults and formatting drive after flashing new firmware. Please note node and sensor configurations prior to resetting and reformatting. Instructions for resetting and reformatting can be found in the Utility Menu Guide here.
NOTE: If you're looking for information regarding opening a serial terminal that can be found here