 |
TH-DIG-iM8 |
¶ Overview
NOTE: The TH-DIG-iM8 sensor has been discontinued. It is available for purchase in small quantities upon request. It has been replaced with the TH-DIG-FL which features flying leads instead of a round connector. Please see this guide for TH-DIG-FL.
The TH-DIG sensor allows for precise and accurate measurements of both the temperature and the humidity of the surrounding area.
¶ Getting Started
¶ Installation
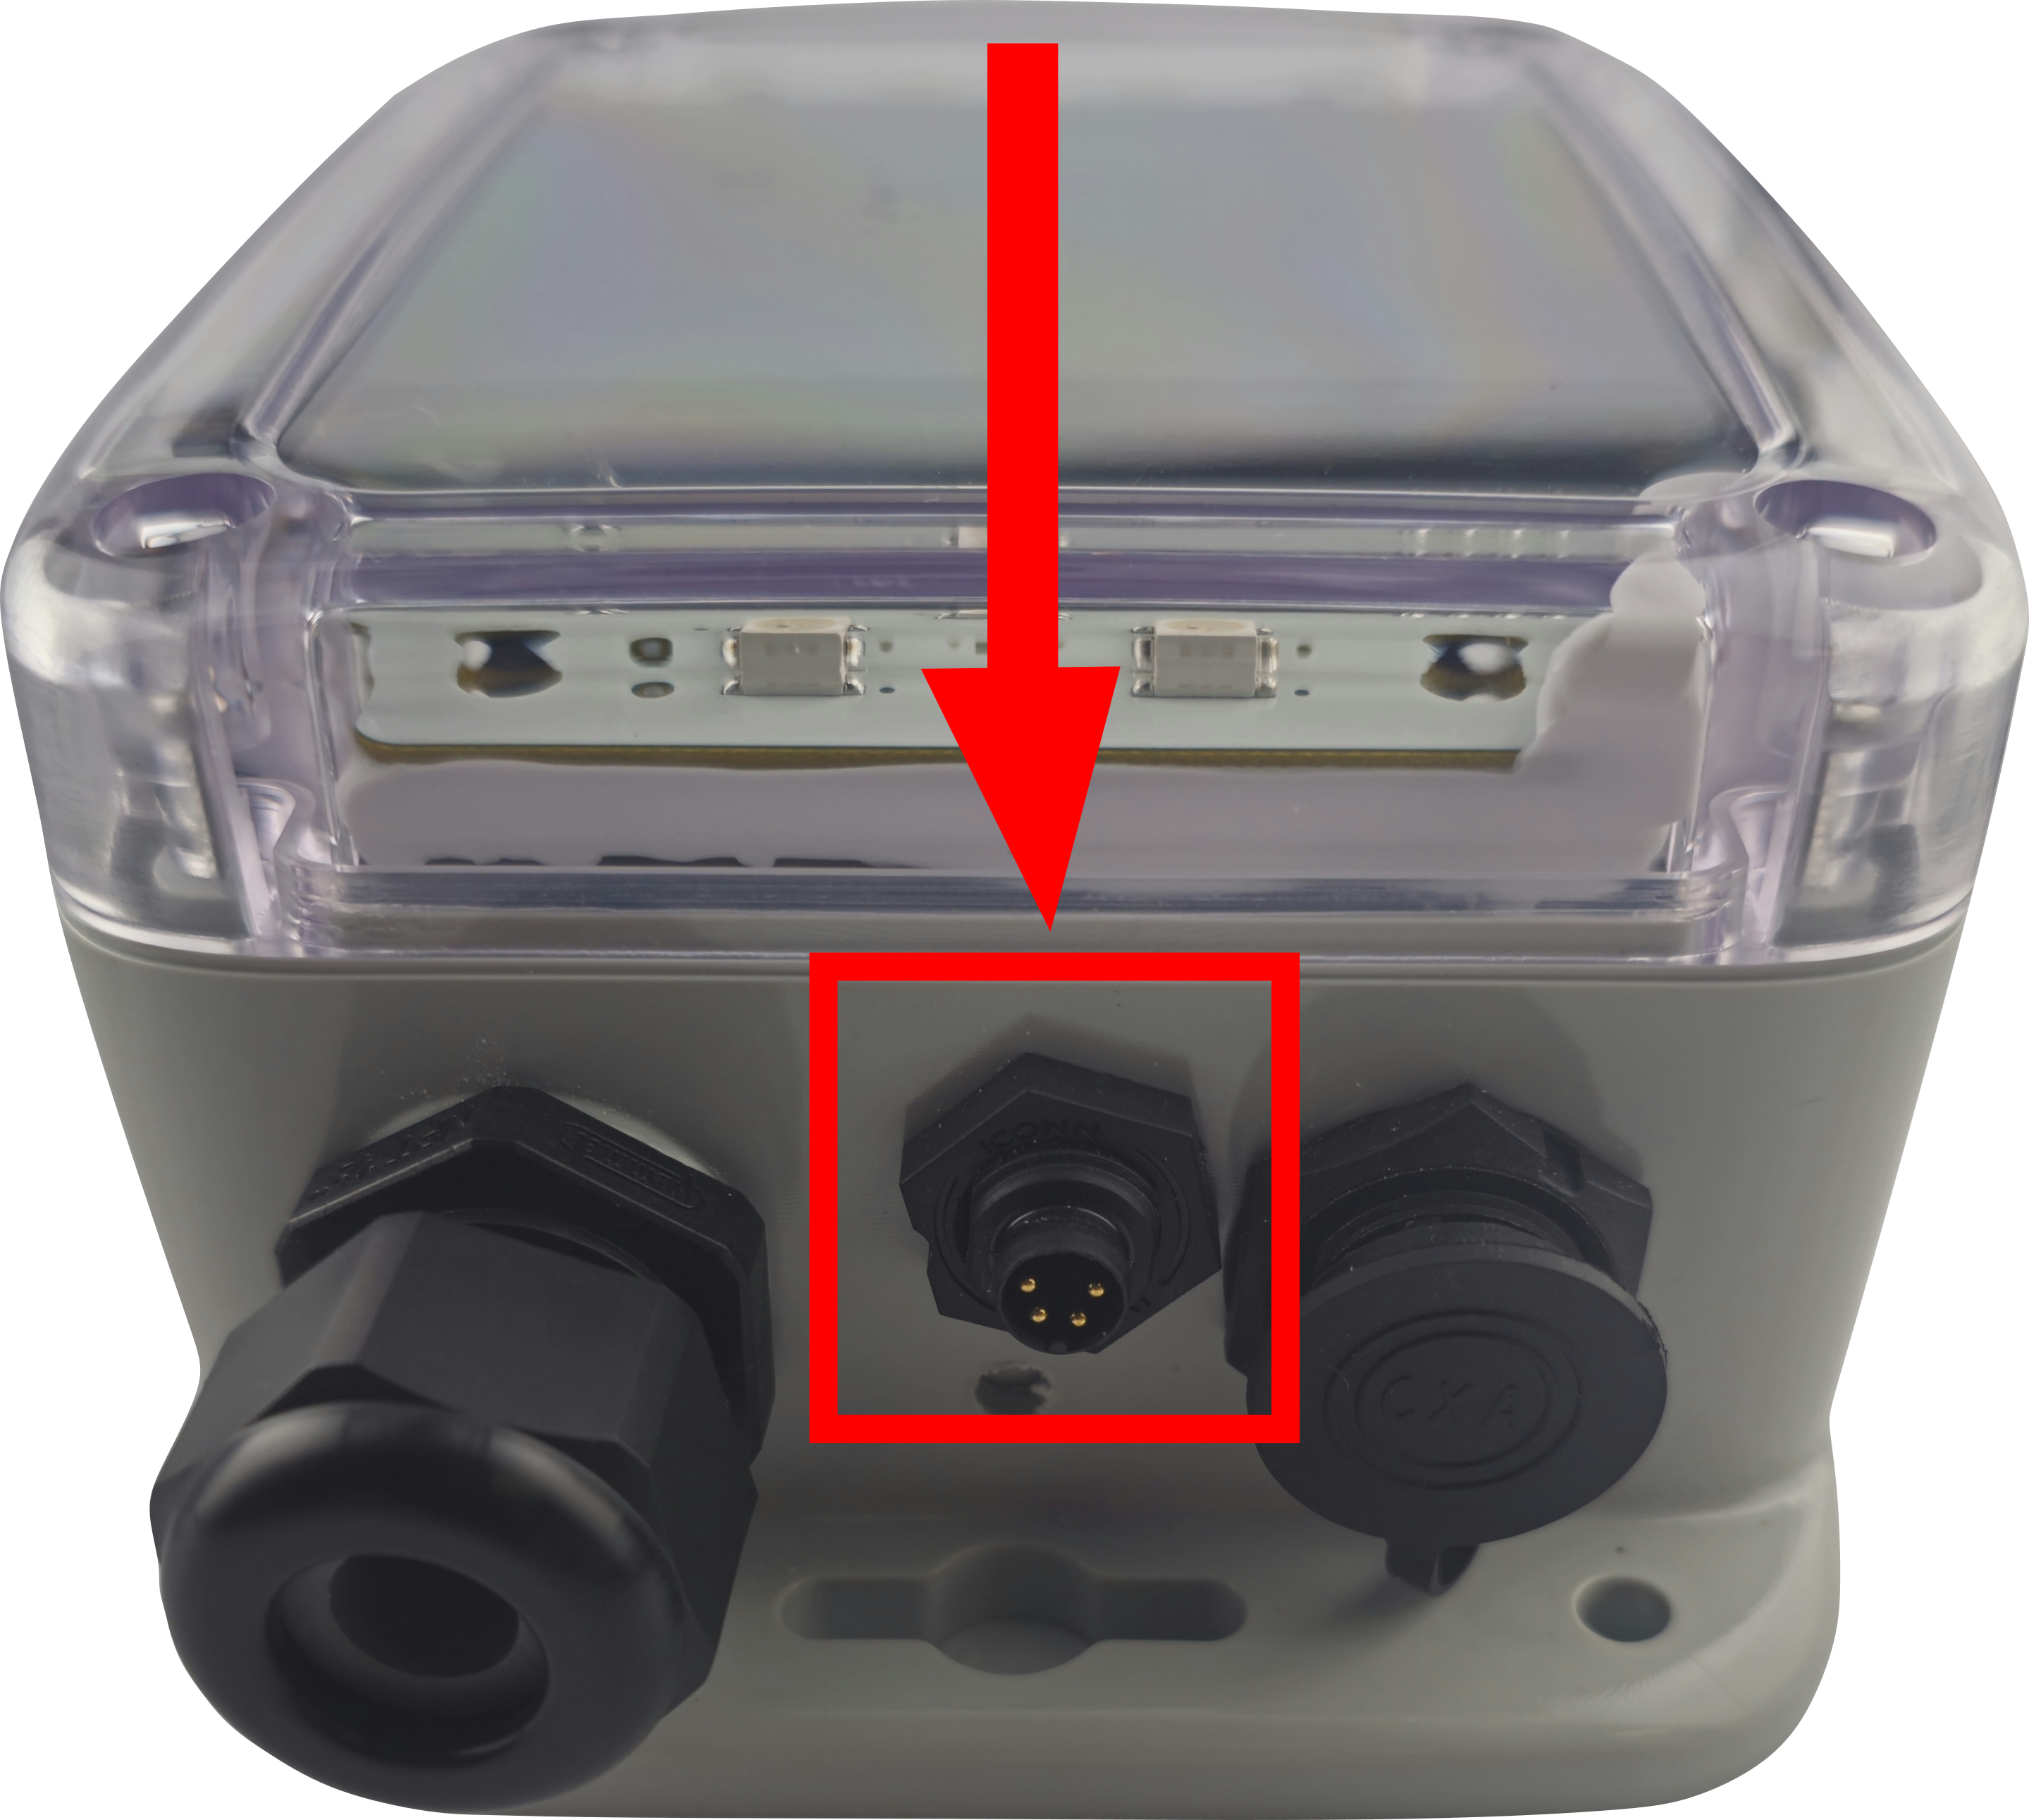
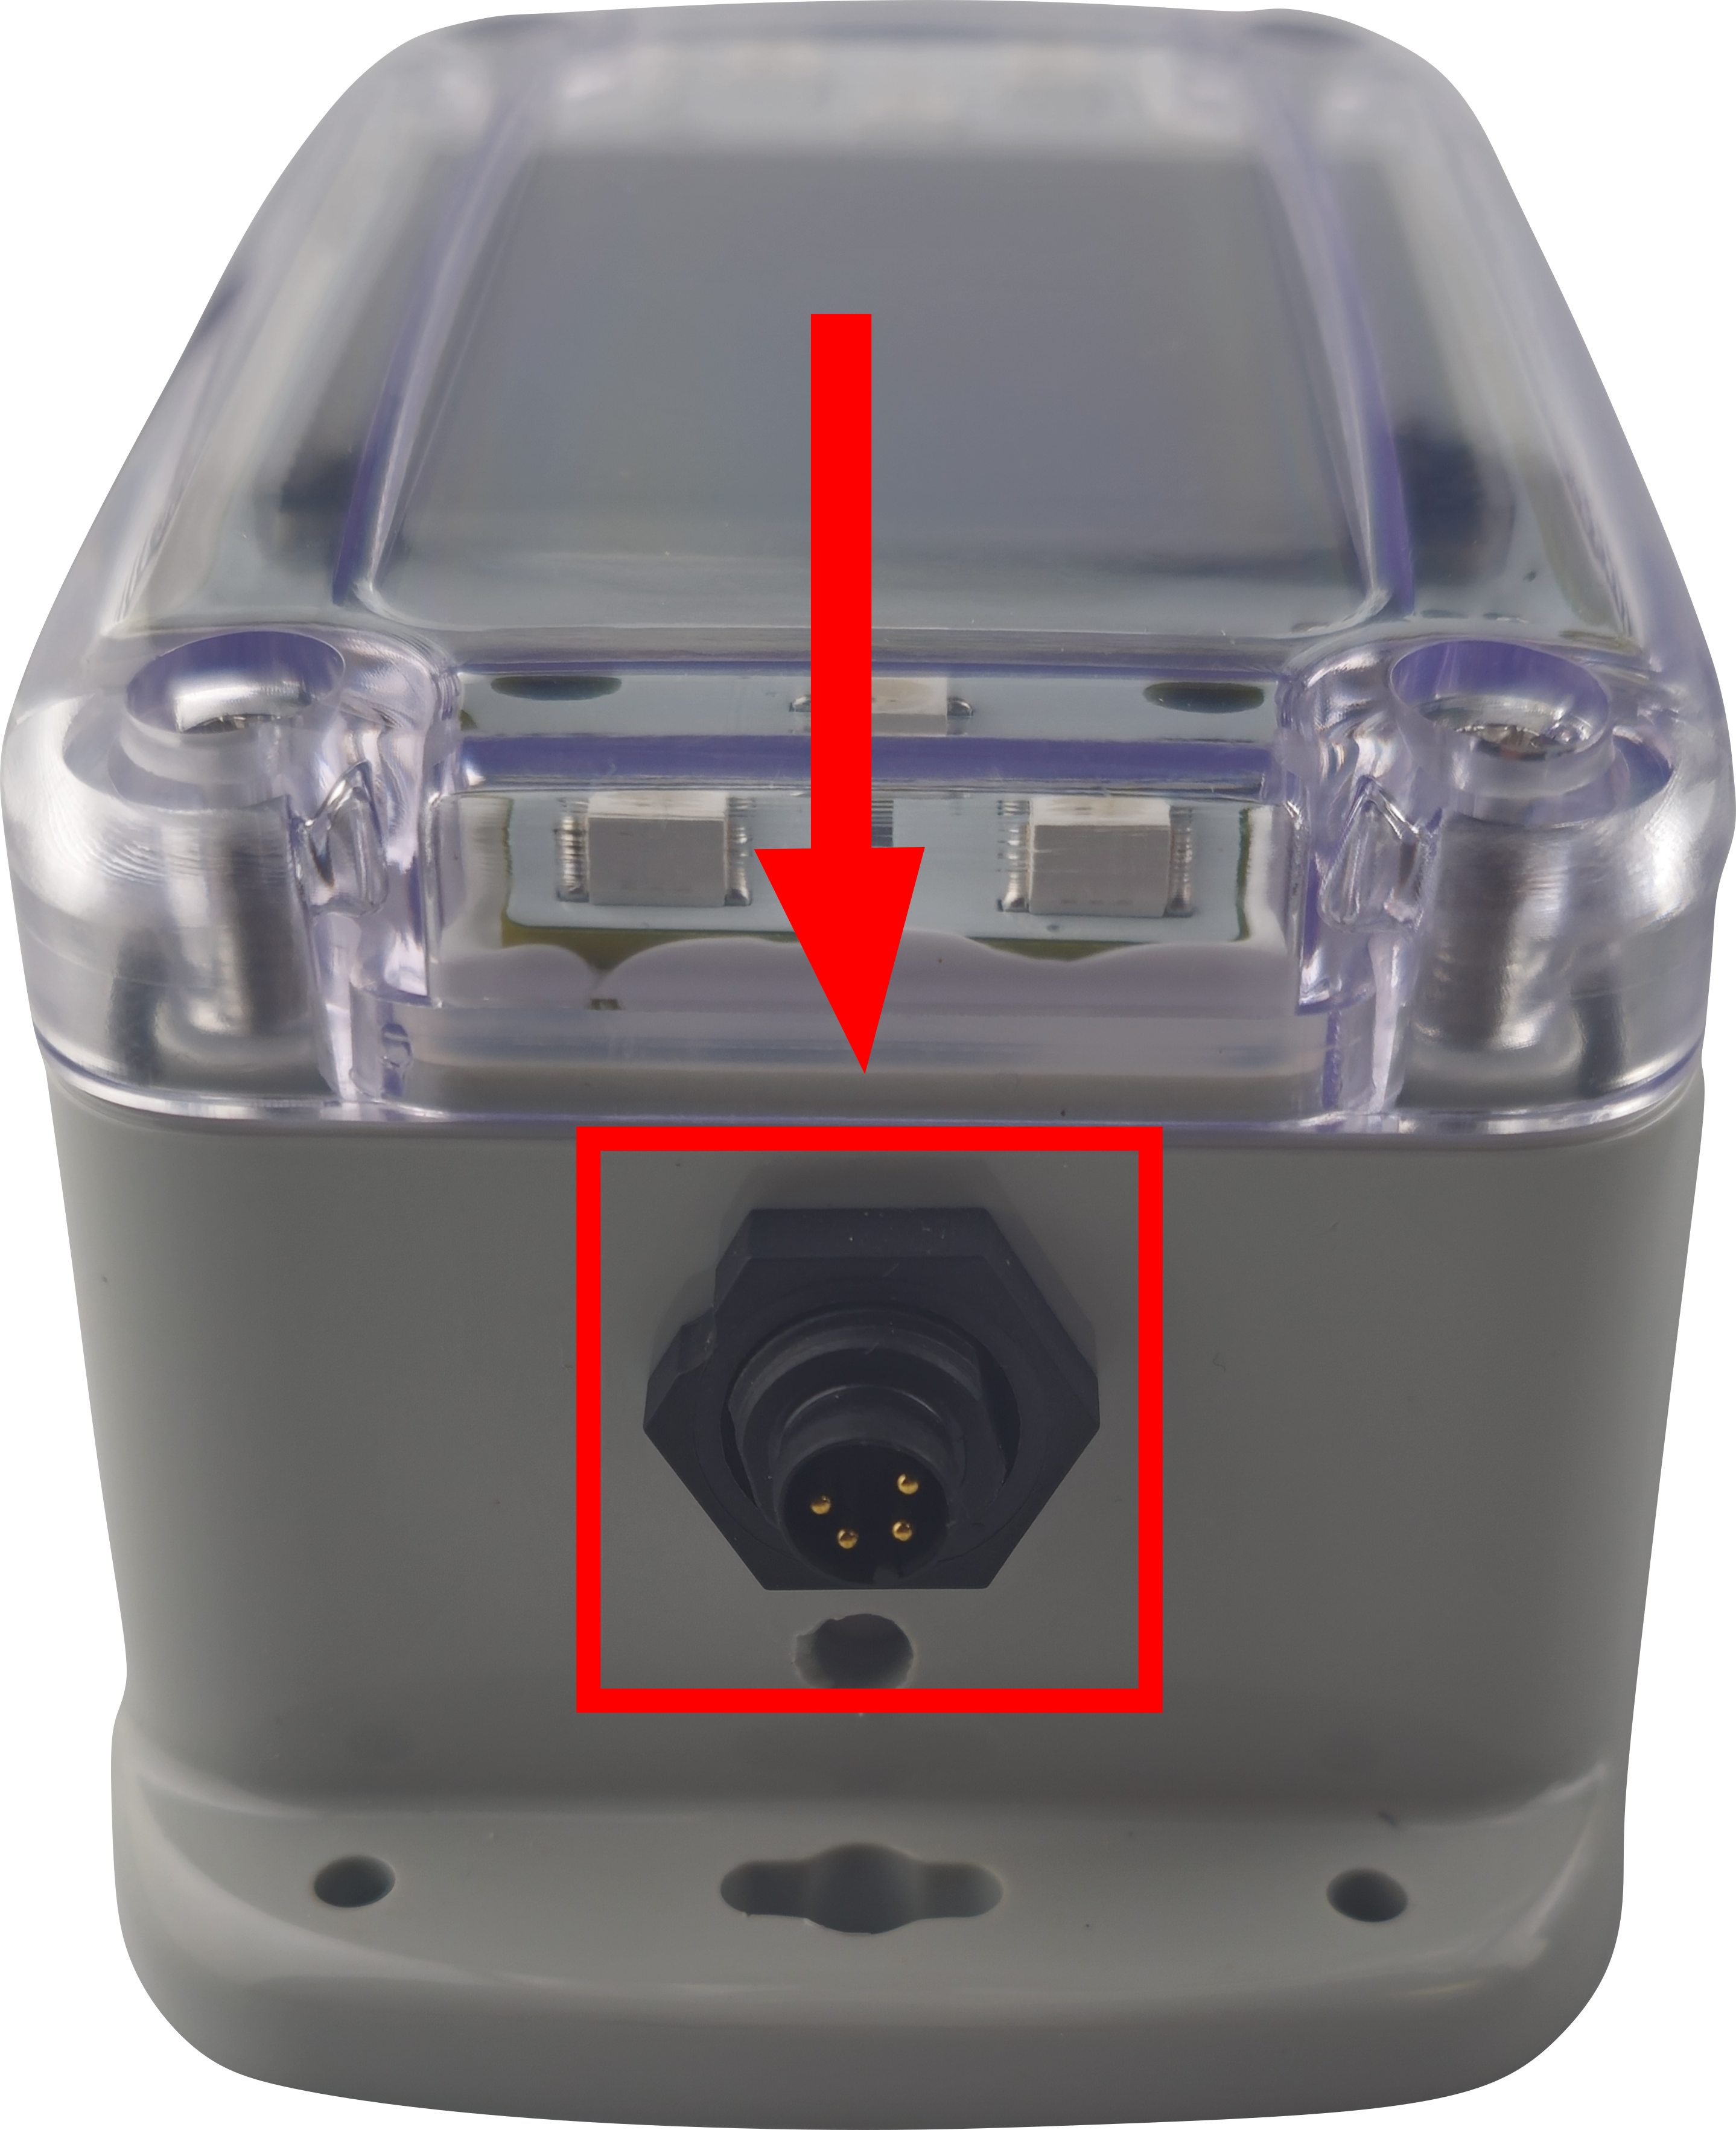
Firmly plug the temperature sensor into the IMX-8 plug located on the automated monitoring node (AMN).
¶ Configuration
¶ Get Prompt
First, you will need to open a serial terminal to the AMN and arrive at the NeatMon Main Menu. If you are unsure how to do this check the Opening Serial Terminal guide.
NeatMon Main Menu
        1: Network config
        2: Sensor config
        3: Utilities
        x: < Save & Quit

>Choose Sensor config by pressing 2.
¶ Select sensor
Sensor Config
        1: Add sensor
        2: Disable Battery monitor
        3: List sensors
        4: Delete sensor
        5: Test read
        x: <Back

>Choose Add sensor by pressing 1.
Create sensor

Select type:
        1: nM TPRH sensor                       9: nM+ A1/A2 analog (5v max)
        2: nM NCTP sensor
        3: nM GPIO analog (4v max)
        4: nM digital counter
        5: nM air quality monitor
        6: Generic SDI-12 Sensor (M)
        7: Sentek RS485 SM
        8: LeafMon sensor
        x: <Back

>Choose nM TPRH sensor by pressing 1.
¶ Configure Sensor
Create sensor

Select type:
        1: nM TPRH sensor
        2: nM NCTP sensor
        3: nM GPIO analog (4v max)
        4: nM digital counter
        5: nM air quality monitor
        6: Generic SDI-12 Sensor (M)
        7: Sentek RS485 SM
        8: LeafMon sensor
        9: Next page....

        x: <Back

>1
Enter sample rate (mins):You can now define how often the sensor will read. If you are unsure, the default is 15 and should rarely be changed. Type your desired sample rate and then press enter.
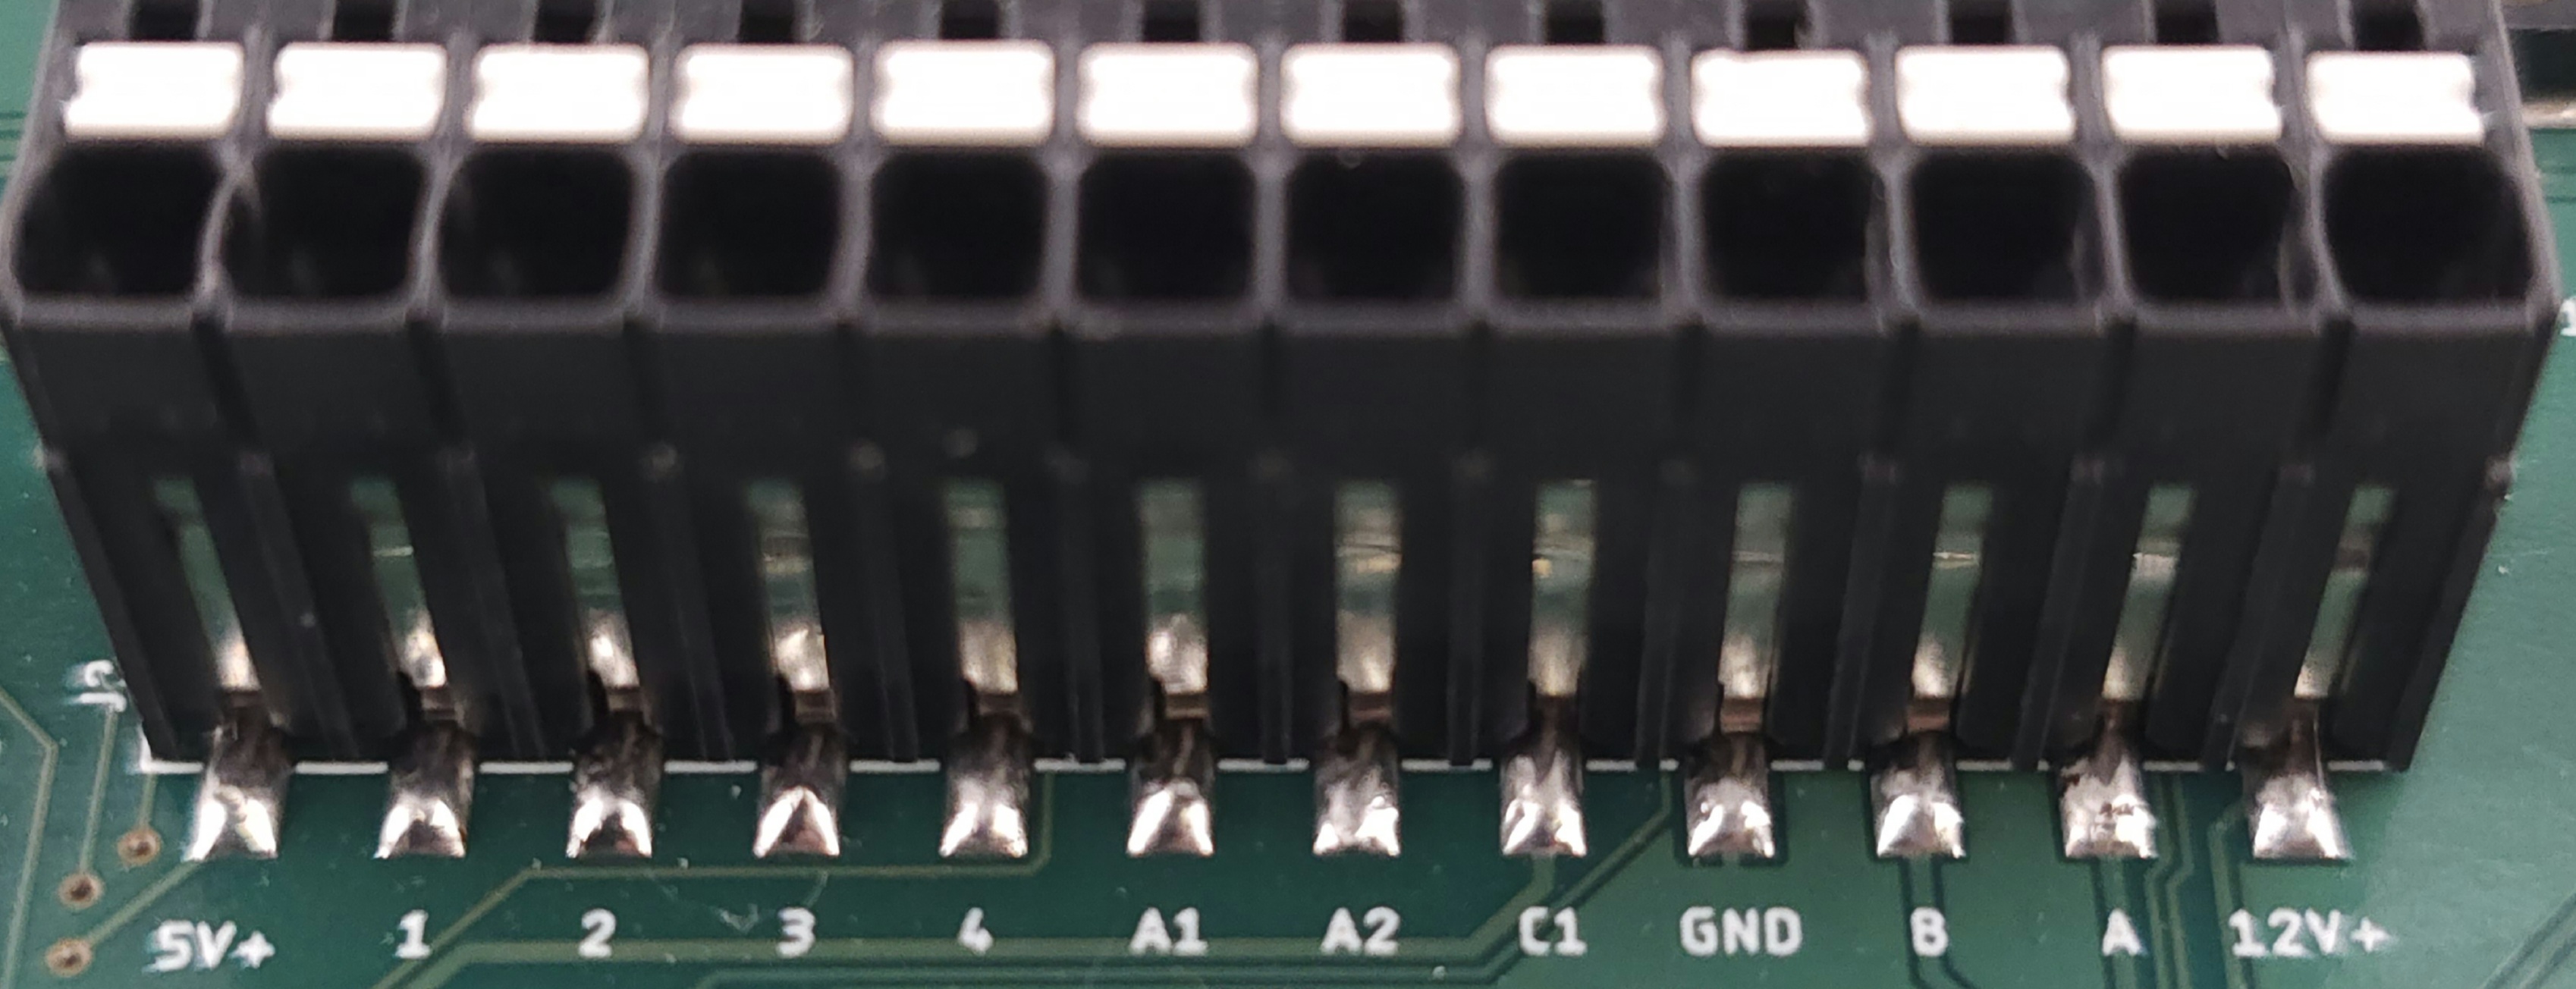
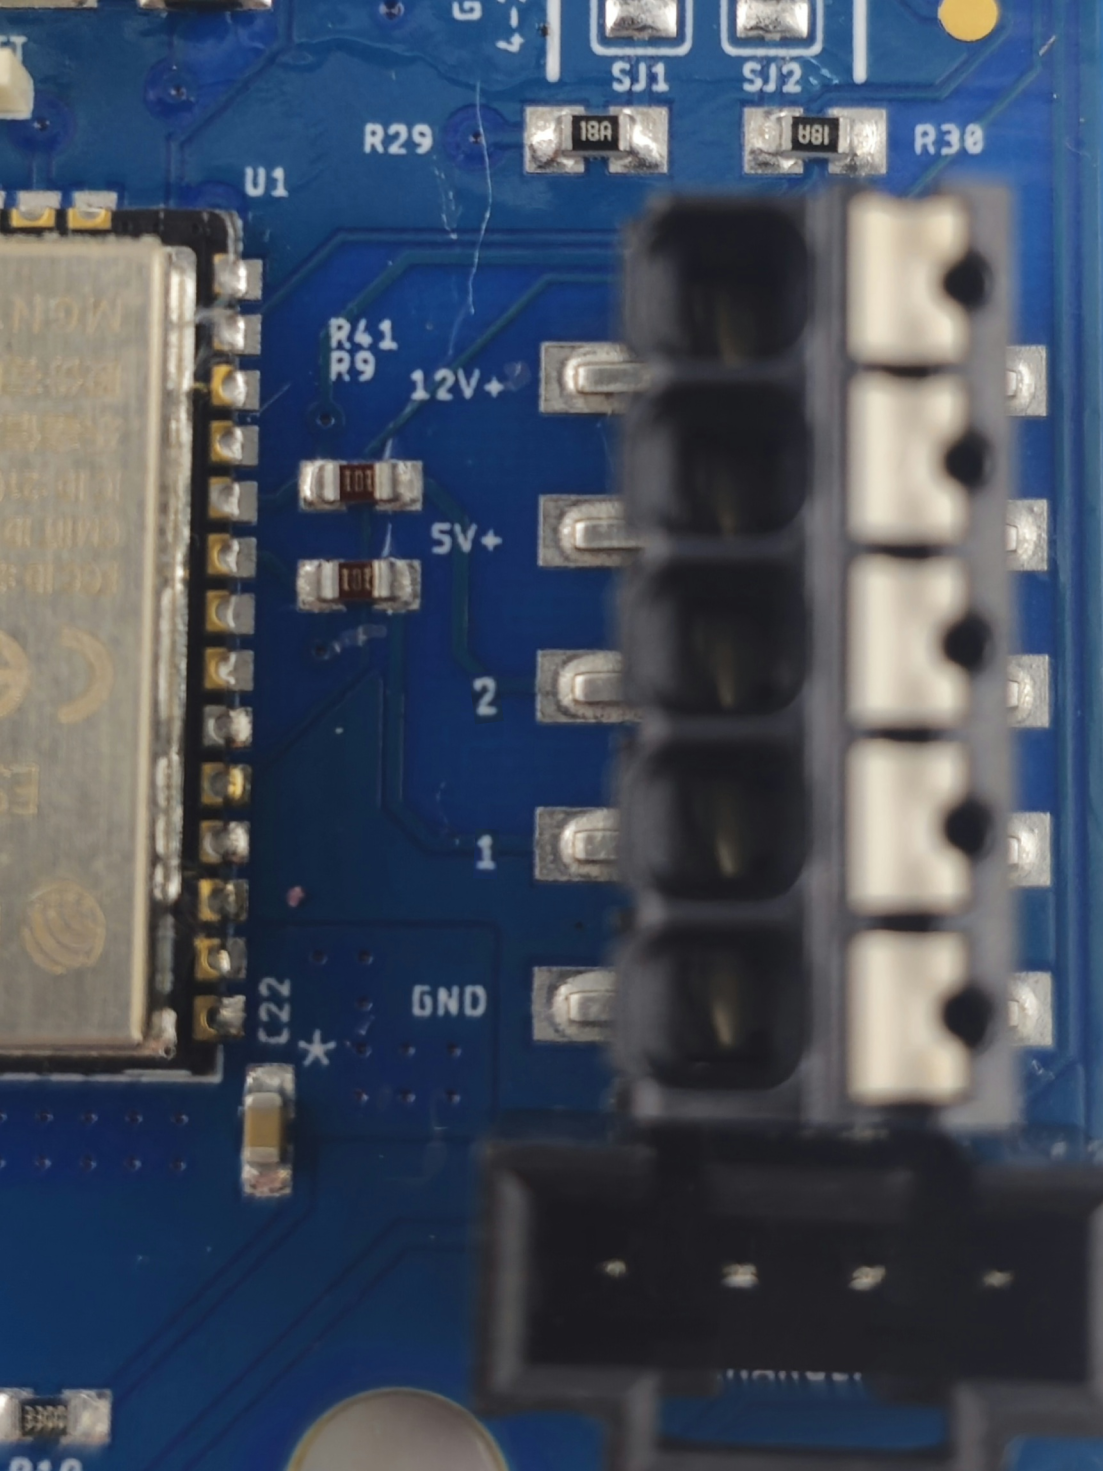
The Clock and Data port is needed for the next two steps. The default clock port is 2 and the default data port is 1.
Enter i2c Clock port (0-4: 0=SCL, 1=GPIO1, 2=GPIO2...):
>Type the clock port number and press enter (default is 2).
Enter i2c Data port (0-4: 0=SDA, 1=GPIO1, 2=GPIO2...):
>Type the data port number and press enter (default is 1).
¶ Save Configuration
Created th1


Sensor Config
        1: Add sensor
        2: Enable Battery monitor
        3: List sensors
        4: Delete sensor
        5: Test read sensors
        x: <Back

>Choose <Back by pressing x.
Created th1


Sensor Config
        1: Add sensor
        2: Enable Battery monitor
        3: List sensors
        4: Delete sensor
        5: Test read sensors
        x: <Back

>x
Exiting...


neatMon Main Menu
        1: Network config
        2: Sensor config
        3: Utilities
        x: < Save & Quit

>Choose Save & Quit by pressing x again.
NOTE: If you don't do this the sensor will not be saved.
¶ Sample Sensor
First, you must open a serial terminal to the AMN and arrive at the NeatMon Main Menu. If you're unsure how to do this check the Opening Serial Terminal guide.
NeatMon Main Menu
        1: Network config
        2: Sensor config
        3: Utilities
        x: < Save & Quit

>Choose Sensor config
Sensor Config
        1: Add sensor
        2: Disable Battery monitor
        3: List sensors
        4: Delete sensor
        5: Test read
        x: <Back

>Choose Test read
0. Battery monitor
1. th1:
        Type: th
        Sample rate (mins): 15
        Interface: I2C [SCL: GPIO2, SDA: GPIO1]
        Misc:

Enter index of sensor to read (x to cancel):Type the number related to the temperature sensor (th means temperature humidity).
 Temp: 23.056000
        Humidity: 47.299915
Read again? Y/nIt will now read the sensor and output the sensor data. Validate data If necessary place the sensor in cold water or blow on it and re-read values. You can type ‘y’ and press enter to take another reading.
¶ Deployment
When deployed, the cable from the temperature sensor should not be kinked or pinched, a gentle sweep is recommended.
It is recommended to add a loose service loop between the AMN and the temperature sensor in the event that the cable is incidentally pulled on.
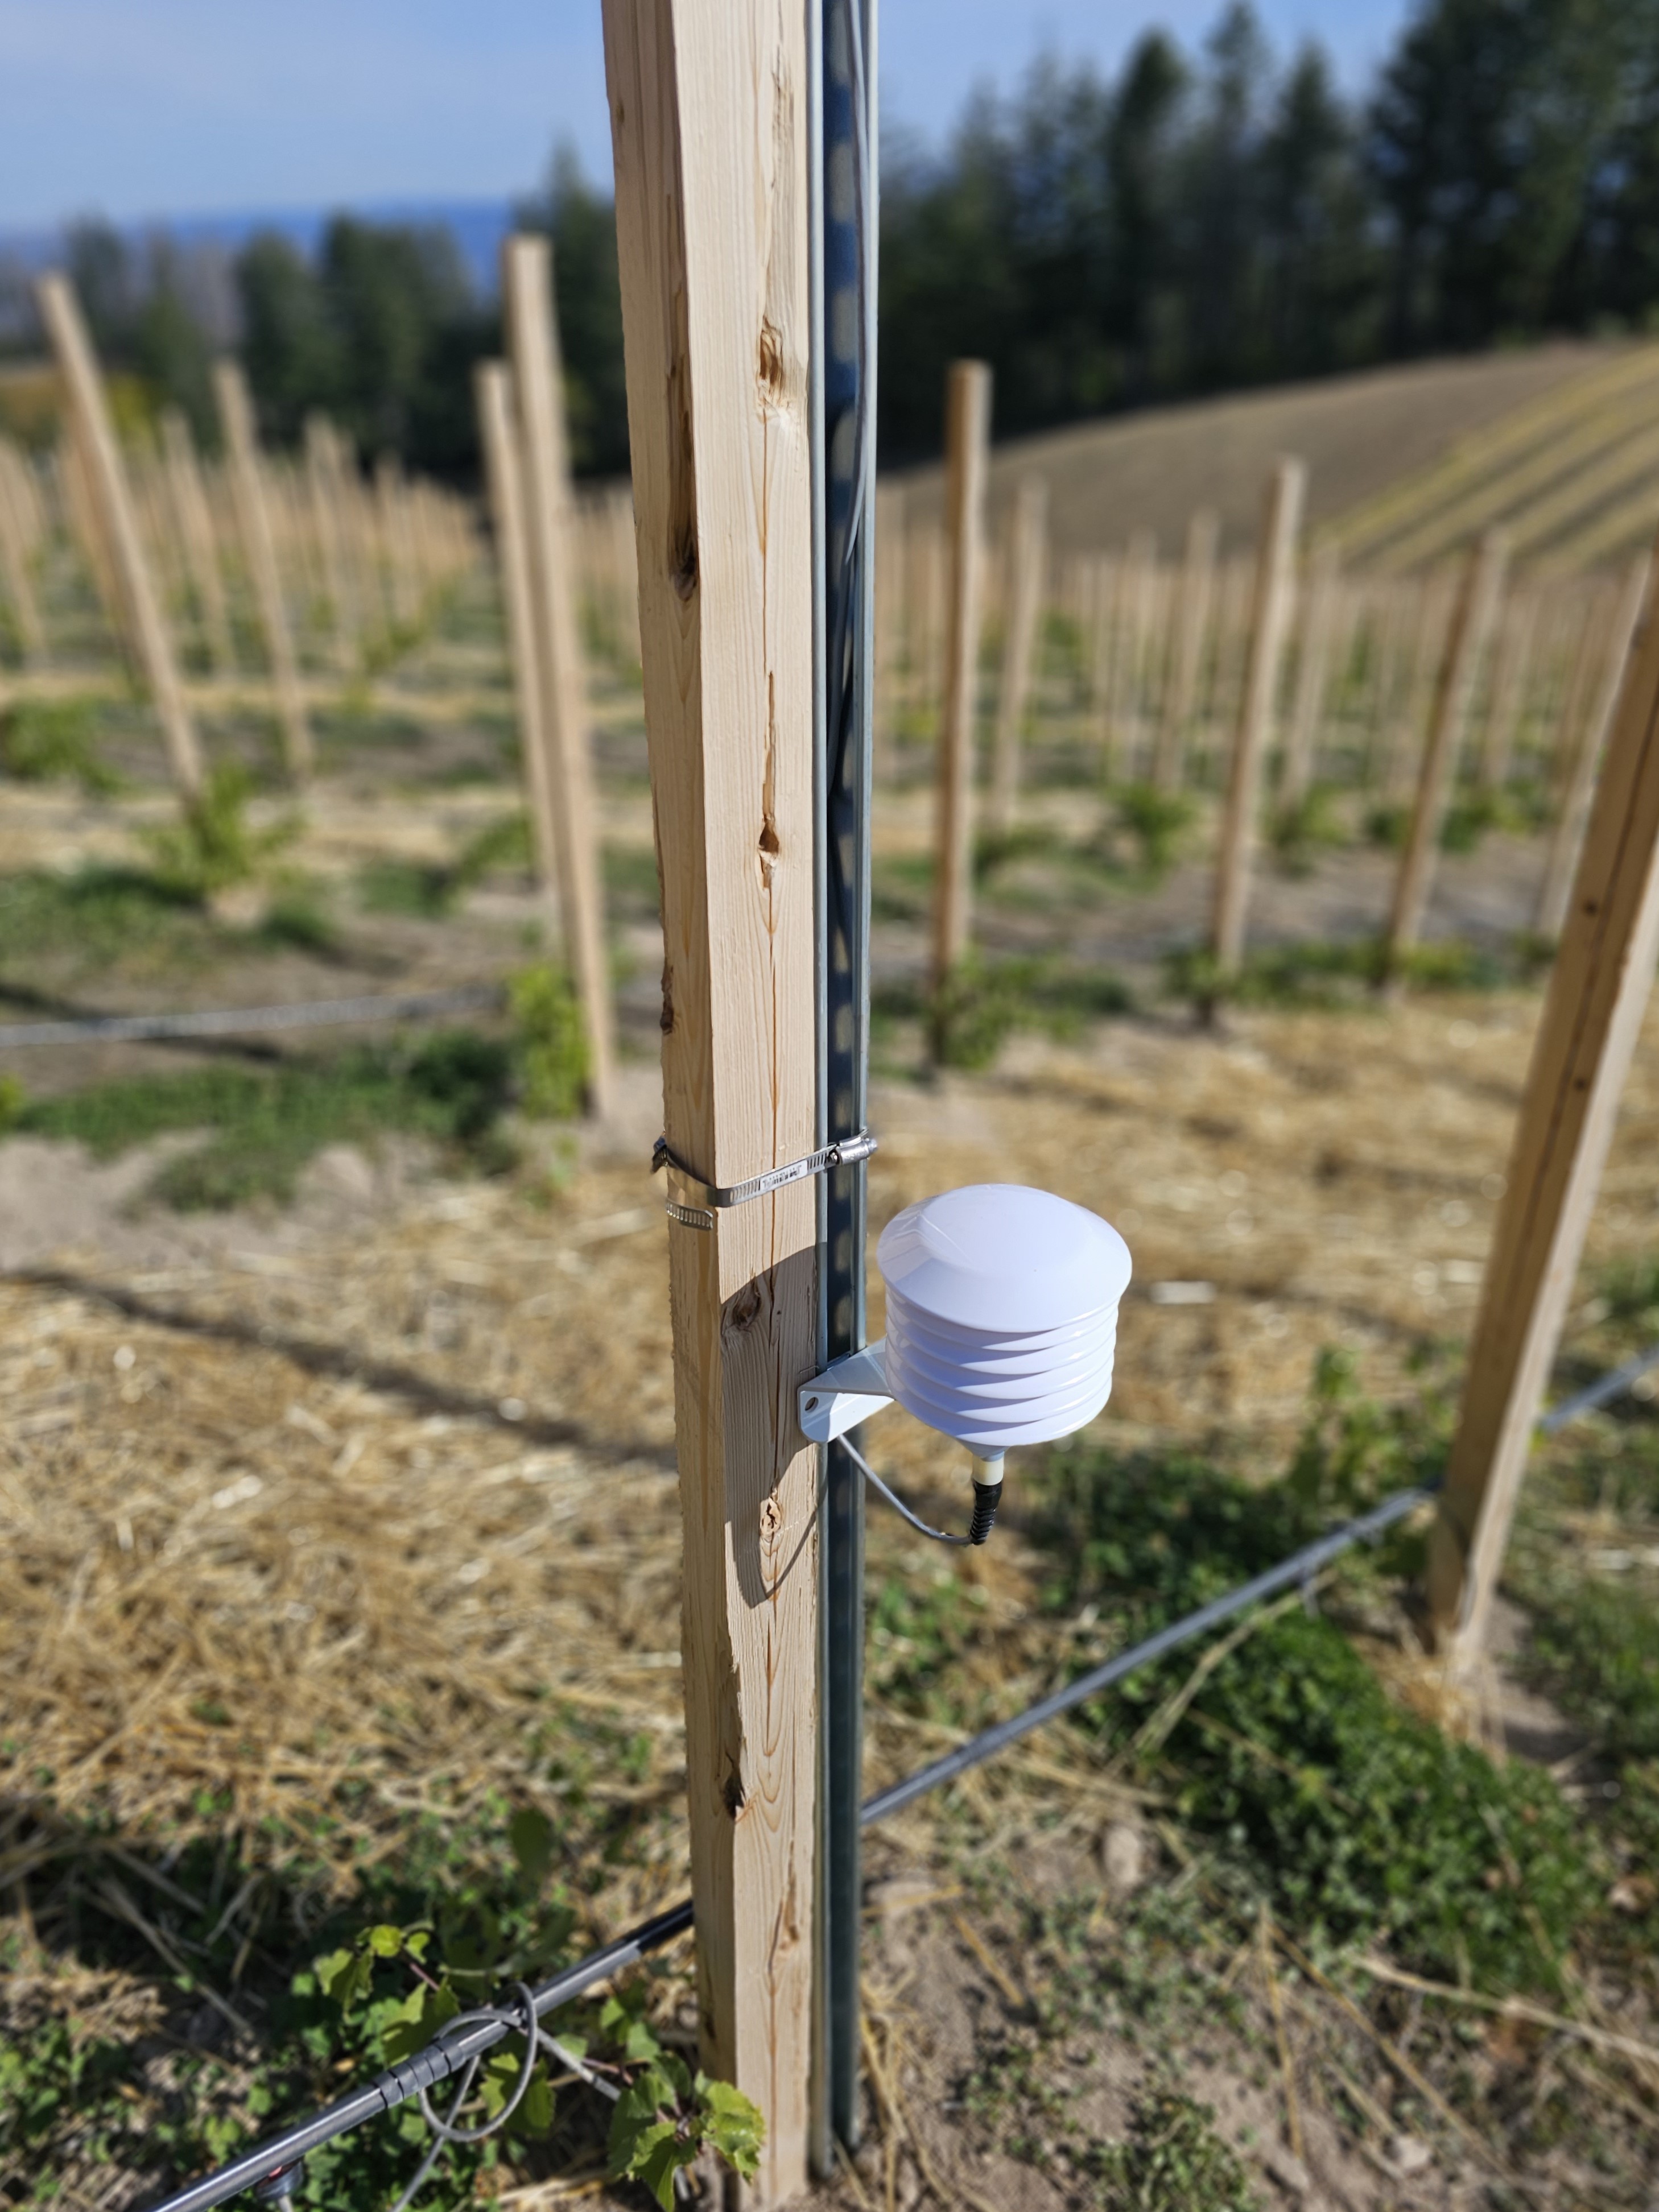
The general height recommendation for the temperature humidity sensor is between 36" to 48" from the soil. The picture above is a good example of a proper deployment of the temperature humidity sensor.