¶ Network Menu Overview
The goal of this guide is to provide functional specifications for the network menu.
From the network menu, all settings for communication with the cloud API are defined. Additionally, testing can be performed to determine if there are any issues with the communication to the server.
For information on debugging cellular connections, please see this article
For information on connecting to the node via MicroUSB and Serial Terminal, please see this article
For information on firmware commands via Serial Terminal connection, please see this article
¶ Cloud API Configuration
Network Config
        1: HTTP Server: "api.neatmon.io"
        2: HTTP Path: "/api/device/f7cfdb7a-edc1-43e7-78e36deb6e0c"
3: HTTP Port: 1330¶ HTTP Server
Description
URI for connecting and sending data. NOTE: Recommend using a qualified hostname as opposed to an IP address, as DNS records can be updated in the event of a server issue.
Acceptable input
Includes characters and numbers. No colons : forward slashes / or http/https
¶ HTTP Path
Description
Route on HTTP Server where HTTP POST requests will be made.
Acceptable input
Includes characters and numbers including forward slashes, and optional {guid} described below. Must not include spaces, and must conform to HTTP specifications.
Options
An additional convenience option exists to simplify setup. {guid} to insert the device GUID in the path instead of typing the full GUID. Note: use lowercase characters only.
¶ HTTP Port
Description
HTTP Port for HTTP POST method
Acceptable Input
Integer number only
¶ Sync Rate
Description
Timer in minutes for sending data stored on the node to cloud API. If no data is saved on the node, it will still try to communicate with API to get the latest time and updates.
Acceptable Input
Integer number only.
¶ Modem-Specific Configuration Options
¶ Wi-Fi Configuration Options
To enter the WiFi Network Configuration page connect to the node and enter “C” when the node begins to initialize, and “1” to enter the configuration pages:
Network Settings:
        Server:         api.neatmon.io
        Path:           /api/device/bbda272d-6fb1-358f-d48afcae6794
        Port:           1330
        SSID:           YOUR_SSID
        Password:       YOUR_PASSWORD
        Sync rate(mins):15
        Alert sync rate(mins):15

General Settings:
        Battery monitor:enabled
        Demo mode:      false
        Num sensors:    0
        Sleep mode:     3
        Power mode:     0

Sensor Definitions/Settings
ID      |       Sensor name

Press 'C' to stop booting and configure.........

neatMon Main Menu
        1: Network Config
        2: Sensor Config
        3: Utilities
        x: < Save & Quit

>1

Network Config
        1: HTTP Server: "api.neatmon.io"
        2: HTTP Path: "/api/device/bbda272d-6fb1-358f-d48afcae6794"
        3: HTTP Port: 1330
        4: API Setup
        5: Sync rate: 15m
        6: WiFi SSID: "YOUR_SSID"
        7: WiFi Password: "YOUR_PASSWORD"
        8: Scan WiFi networks
        9: Next page....
        x: <Back

>9
Network Config Continued...
        1: Connect to WiFi: YOUR_SSID
        2: Alert sync rate: 15m
        x: <Back
>¶ WiFi SSID
Description
“Service Set IDentifier” is the identification for Wi-Fi network name
Acceptable input
Includes characters and numbers. No spaces
¶ WiFi Password
Description
Password used for Wi-Fi network authentication
Acceptable input
Includes characters and numbers. No spaces
¶ Cellular Configuration Options
To enter the Cellular Network Configuration page connect to the node and enter “C” when the node begins to initialize, and “1” to enter the configuration pages:
Press 'C' to stop booting and configure........
neatMon Main Menu
        1: Network Config
        2: Sensor Config
        3: Utilities
        x: < Save & Quit
>1
Network Config
        1: HTTP Server: "api.neatmon.io"
        2: HTTP Path: "/api/device/bbda272d-6fb1-358f-d48afcae6794"
        3: HTTP Port: 1330
        4: API Setup
        5: Sync rate: 15m
        6: APN Network: "vzwinternet"
        7: APN Username: ""
        8: APN Password: ""
        9: Next page....
x: <BackEnter 9 to access the next page for additional settings:
>9
Network Config Continued...
        1: Disable modem debugging
        2: Network Registration Type: "LTE"
        3: Select Modem Type: "ME910G1"
        4. Select Modem Firmware: "1"
        5: Alert sync rate: 15m
        x: <Back
¶ API Setup
Description
From this menu option, pre-set HTTP settings can be applied for the neatMon API as well as pre-configured Vendors using the Vendor ID. HTTP settings can also be configured manually (see Cloud API Configuration above).
>4
Enter hostname/code:
Type neatmon to reset to nM API, or enter vendor ID
        x: <Back
Acceptable input
If using a pre-configured vendor, please contact neatMon for Vendor ID. Includes alpha characters and numbers including . no spaces permitted
¶ Sync rate
Description
Set frequency that node syncs with the server to upload stored sensor data and receive commands. 15 minutes recommended for most configurations. 3 minute is the shortest recommended sync frequency.
>5
Type new server sync rate (mins):Acceptable input
Enter the number of minutes desired for sync rate.
¶ APN Network
Description
APN Server specified by the cellular provider.
>6
Select APN Network:
        1: Verizon
        2: Hologram
        3: Enter APN
        x: <Back
Acceptable input
Select Verizon or Hologram. If using a different carrier, select Enter APN- Includes alpha characters and numbers including . no spaces permitted
¶ APN Username and APN Password
Description
Authentication credentials specified by the cellular provider. Note: Many providers do not require these parameters. Inquire with provider if unsure.
Acceptable input
Includes alpha characters and numbers including . no spaces permitted
¶ Modem debugging
Description
Allows for debugging or viewing the communication between the modem and the node while under normal operation. Helpful for determining communication issues. Such as when no response from the modem or when the node is unable to complete the transmission to the Cloud API server.
Acceptable input
Input “1” to toggle setting when viewing "Network Config Continued…". When the option is chosen the setting changes
Network Config Continued...
        1: Enable modem debugging
        2: Network Registration Type: "LTE"
        3: Select Modem Type: "ME910G1"
        4. Select Modem Firmware: "1"
        5: Alert sync rate: 15m
        x: <Back
>1
Modem: debugging enabled
Network Config Continued...
        1: Disable modem debugging
        2: Network Registration Type: "LTE"
        3: Select Modem Type: "ME910G1"
        4. Select Modem Firmware: "1"
        5: Alert sync rate: 15m
        x: <Back
>1
Modem: debugging disabled
Network Registration Type
Description
Allows for setting the modem communication bands. LTE is recommended for Verizon, Auto is recommended for all other carriers.
>2
Select network registration type (LTE) :
        1: Auto
        2: EPS/LTE (4G)
        3: GPRS (3G)
        4: GSM (2G)
x: <BackAcceptable input
Enter corresponding number for desired setting, or x to exit.
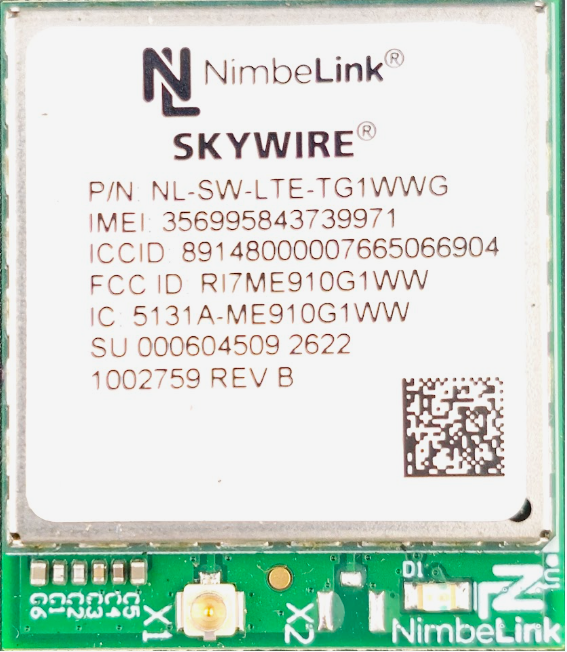
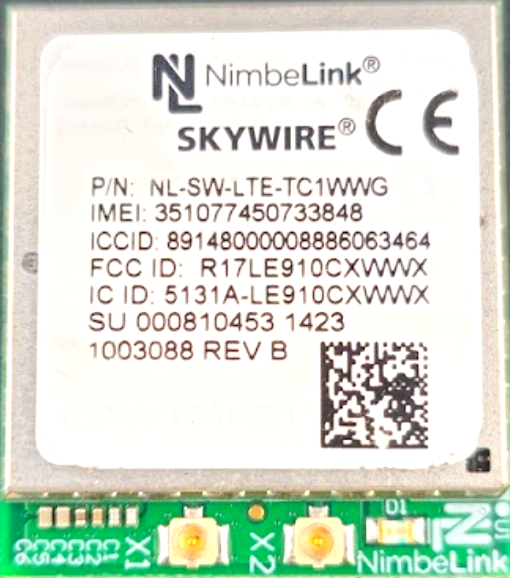
¶ Select Modem Type
Description
Select the appropriate modem:

|

|
>3
Select modem type (ME910G1) :
        1: LE910Cx (H Modem)
        2: ME910G1 (C Modem)
x: <BackAcceptable input
Enter corresponding number for desired setting, or x to exit.
¶ Select Modem Firmware
Description
Selecting modem type will automatically prompt user to select modem firmware. Modem firmware can also be modified separately. AT&T, Rest of World, and Global suggested for Hologram. Verizon required for Verizon.
Options if C Modem was selected:
Select modem firmware (1) :
        1: AT&T (0)
        2: Verizon (1)
        3: Rest of World (2)
        4: AU (3)
x: <BackOptions if H Modem was selected:
Select modem firmware (1) :
        1: AT&T (0)
        2: Verizon (1)
        3: Bell (3)
        4: Telus (4)
        5: Global (40)
x: <BackAcceptable input
Enter corresponding number for desired setting, or x to exit.
¶ Alert Sync Rate
Description
Some sensors (such as Analog Sensors and TH-DIG) have the ability to change their sample rate if an “Alert” state is triggered. Increased sampling/sync frequency may deplete battery more quickly. Unless required, it is recommended to set the Alert sync to the same setting as Sync Rate on the first page.
Network Config Continued...
        1: Disable modem debugging
        2: Network Registration Type: "LTE"
        3: Select Modem Type: "LE910Cx"
        4. Select Modem Firmware: "1"
        5: Alert sync rate: 15m
        x: <Back
>5
Type new server alert sync rate (mins):Acceptable input
Enter desired Alert state sync frequency (# of minutes)