 |
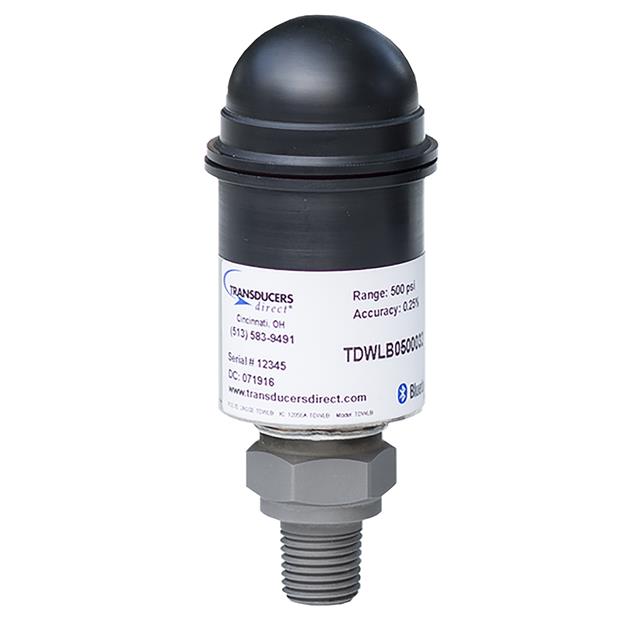
TD BLE Pressure Sensor |
 |
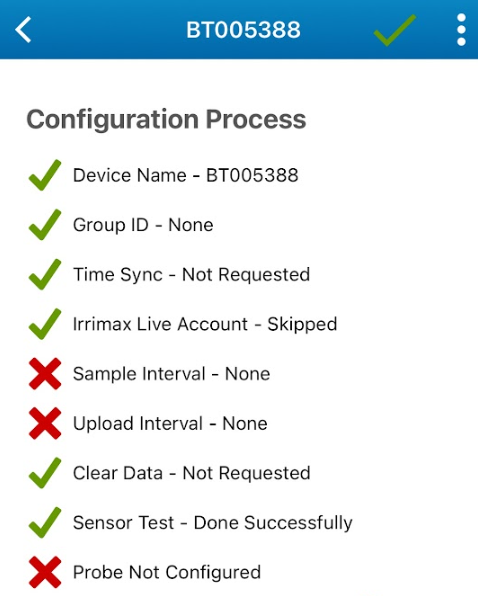
Sentek BLE Soil Sensor |
¶ Overview
neatMon Automated Monitoring Nodes have built-in Bluetooth capability (up to Bluetooth 4.0, and Bluetooth Low Energy- also known as BLE).
¶ Getting Started
¶ Installation
Ensure that you are running firmware version 3.03 or newer. For instructions on updating firmware, please refer to the Firmware Guide.
Please ensure that your Sentek BLE or Transducers Direct (TD) BLE Pressure sensor has batteries installed and that the batteries are in the correct orientation (Sentek for example requires you to remove the blue cap and flip the battery 180 degrees, and reinstall the blue cap). The Sentek BLE manual can be found here, and the TD BLE Pressure Transducer manual can be found here.
Max range from sensor to node with the standard antenna on neatMon Automated Monitoring Nodes is 15-75ft depending on the site conditions. Adding an external antenna may boost the range 500+ft depending on site conditions. Topography changes, canopy or other physical interference, electrical interference, and sensor type may affect range.
To aid in finding and identifying the Bluetooth sensor names and/or MAC Addresses, you can download the TD CirrusSense app here for Apple and here for Android; and the Sentek Connect app here for Apple and here for Android.
For the Sentek sensor, these are the recommended sensor settings (configured using the Sentek Connect app and selecting the sensor and then “RECONFIGURE”) for communicating via the neatMon node or directly BLE connection with a phone. Please note, turning off “Sample Interval” will keep the sensor from locally storing data. You will still be able to read the probe using the Sentek Connect app for real time data. If you wish to have the data stored locally on the probe, please contact neatMon support.
Please refer to sensor guides for battery life and ordering information.
Sleep mode 1 or 3 may be selected.
¶ Configuration
¶ Get Prompt
First, you will need to open a serial terminal to the AMN and arrive at the neatMon Main Menu. If you are unsure how to do this check the Opening Serial Terminal guide.
NeatMon Main Menu
        1: Network config
        2: Sensor config
        3: Utilities
        x: < Save & Quit

>2Choose Sensor config by pressing 2.
¶ Select sensor
Sensor Config
        1: Add sensor
        2: Disable Battery monitor
        3: List sensors
        4: Delete sensor
        5: Test read
        x: <Back

>1Choose Add sensor by pressing 1.
Create sensor

Select type:
 	1: nM TPRH sensor
 	2: nM NCTP sensor
 	3: nM GPIO analog (4v max)
 	4: nM digital counter
 	5: nM air quality monitor
 	6: Generic SDI-12 Sensor
 	7: Sentek RS485 SM
 	8: LeafMon sensor
 	9: Next page....

 	x: <Back

 >9

 Sensor list continued...

 Select type:
 	1: nM+ A1/A2 analog (5v max)
	2: Relay Controller - 8 Relay
 	3: Relay Controller - RS485
 	4: Davis VP2 Weather Station - RS485
 	5: High frequency kHz counter
 	6: GPIO Pulse counter
 	7: Modbus Sensor
 	8: HD GPS (ZED-F9P)
 	9: Next page....

 	x: <Back to Sensor Menu


 >9


 Sensor list continued...

 Select type:
 	1: EXP-ADC-16P
 	2: Bridge/24-bit ADC
 	3: nM+ Relay-DCL-3
 	4: nM+ THCO2 sensor
 	5: Bluetooth sensor

 	x: <Back to Sensor Menu

>5Choose Next page by pressing 9 twice until you arrive on the page containing “Bluetooth sensor”. Enter 5 to select "Bluetooth sensor".
¶ Configure Sensor
Create sensor

Select type:
 	1: EXP-ADC-16P
 	2: Bridge/24-bit ADC
 	3: nM+ Relay-DCL-3
 	4: nM+ THCO2 sensor
 	5: Bluetooth sensor

 	x: <Back to Sensor Menu

 >5
Enter sample rate (mins):15You can now define how often the sensor will read. If you are unsure, the default is 15 and should rarely be changed. Type your desired sample rate and then press enter.
> Enter custom name (max 3 chars): psiEnter a 3 character name for the sensor. E.g. psi for a pressure transducer, or smt for a soil moisture/temperature sensor.
 Scanning for peripherals
 BLE: Scan Ended, reason: 0
 BLE: Number of device found: 2
 Device:  [19394]
 	Address:  7c:e2:69:a8:f6:f9
 	Type:     0
 	Tx Power: 10
	RSSI: -56
 Device:  [BT005388]
 	Address:  6c:1d:eb:ab:17:09
 	Type:     0
 	Tx Power: -99
 	RSSI: -58
 Number of device found: 2
 Scan again? (Y/n)
> nThe node will now scan for near-by bluetooth devices. Once the scan is complete, if you recognize the device in the list of devices found, enter “n” to continue to the next step. If you do not see your device, ensure that it is powered on and within range. If you are unsure which is your device, use the CirrusSense or Sentek mobile apps to connect with your sensor to find the MAC address or sensor name. In the example above, 19394 is a TD BLE Pressure sensor and BT005388 is a Sentek BLE Soil Moisture/Temperature sensor.
Enter Bluetooth device MAC address (FF:FF:FF:FF:FF:FF)
Note: colons will be automatically inserted.
>7c:e2:69:a8:f6:f9

 BLE Address entered: 7c:e2:69:a8:f6:f9

Is this correct? (Y/n)
> YEnter the MAC address of the device you wish to add matching what was found on the scan (no need to enter colons). If you have entered it correctly, enter “Y” to proceed. The example above is for the TD BLE Pressure Transducer found in the scan above.
 Select sensor type:
 	1. TD Pressure
 	2. Sentek SM
 >1

> Created psiSelect the sensor type.
¶ Save Configuration
Created psi

Sensor Config
        1: Add sensor
        2: Enable Battery monitor
        3: List sensors
        4: Delete sensor
        5: Test read sensors
        x: <Back

>Choose <Back by pressing x.
Created psi

Sensor Config
        1: Add sensor
        2: Enable Battery monitor
        3: List sensors
        4: Delete sensor
        5: Test read sensors
        x: <Back

>x
Exiting...

neatMon Main Menu
        1: Network config
        2: Sensor config
        3: Utilities
        x: < Save & Quit

>xChoose Save & Quit by pressing x again.
NOTE: If you don't do this the sensor will not be saved.
¶ Sample Sensor
First, you must open a serial terminal to the AMN and arrive at the NeatMon Main Menu. If you're unsure how to do this check the Opening Serial Terminal guide.
NeatMon Main Menu
        1: Network config
        2: Sensor config
        3: Utilities
        x: < Save & Quit

>2Choose Sensor config by pressing 2.
Sensor Config
        1: Add sensor
        2: Disable Battery monitor
        3: List sensors
        4: Delete sensor
        5: Test read
        x: <Back

>5Choose Test read by pressing 5.
0. Battery monitor
 1.	|	psi		|	2570
 	Type: bt [22]
 	Sample rate (mins): 15
 	Interface: Bluetooth
 	Port: 0
 	Misc:
 		Address: 7C:E2:69:A8:F6:F9
 		Sensor: TD Pressure
 2.	|	smt		|	2570
 	Type: bt [22]
 	Sample rate (mins): 30
 	Interface: Bluetooth
 	Port: 0
 	Misc:
 	Address: 6c:1d:eb:ab:17:09
	Sensor: Sentek SM

Enter index of sensor to read (x to cancel): >1Type the number related to the bluetooth sensor and it will be searched for and read if powered on and within range. When the sensor is read, the signal strength will be reported. Closer to 0 indicates a stronger signal strength. For example, RSSI: -65 is a stronger signal than RSSI: -85. If your signal strength is worse than -90, consider repositioning the sensor, repositioning the node, or adding an external antenna as you may experience difficulty reading the sensor due to lack of signal.
¶ Deployment
Once configured, the neatMon node will search for the configured bluetooth device for up to 2 minutes at the specified sample rate interval. The bluetooth devices are always in pairing mode and will automatically connect with and send data to the node if it has battery and is within range. If the sensor fails to connect and has a good battery and is within range, try removing and re-installing the sensor's battery. Please refer to sensor manuals for battery life and replacement information.