 |
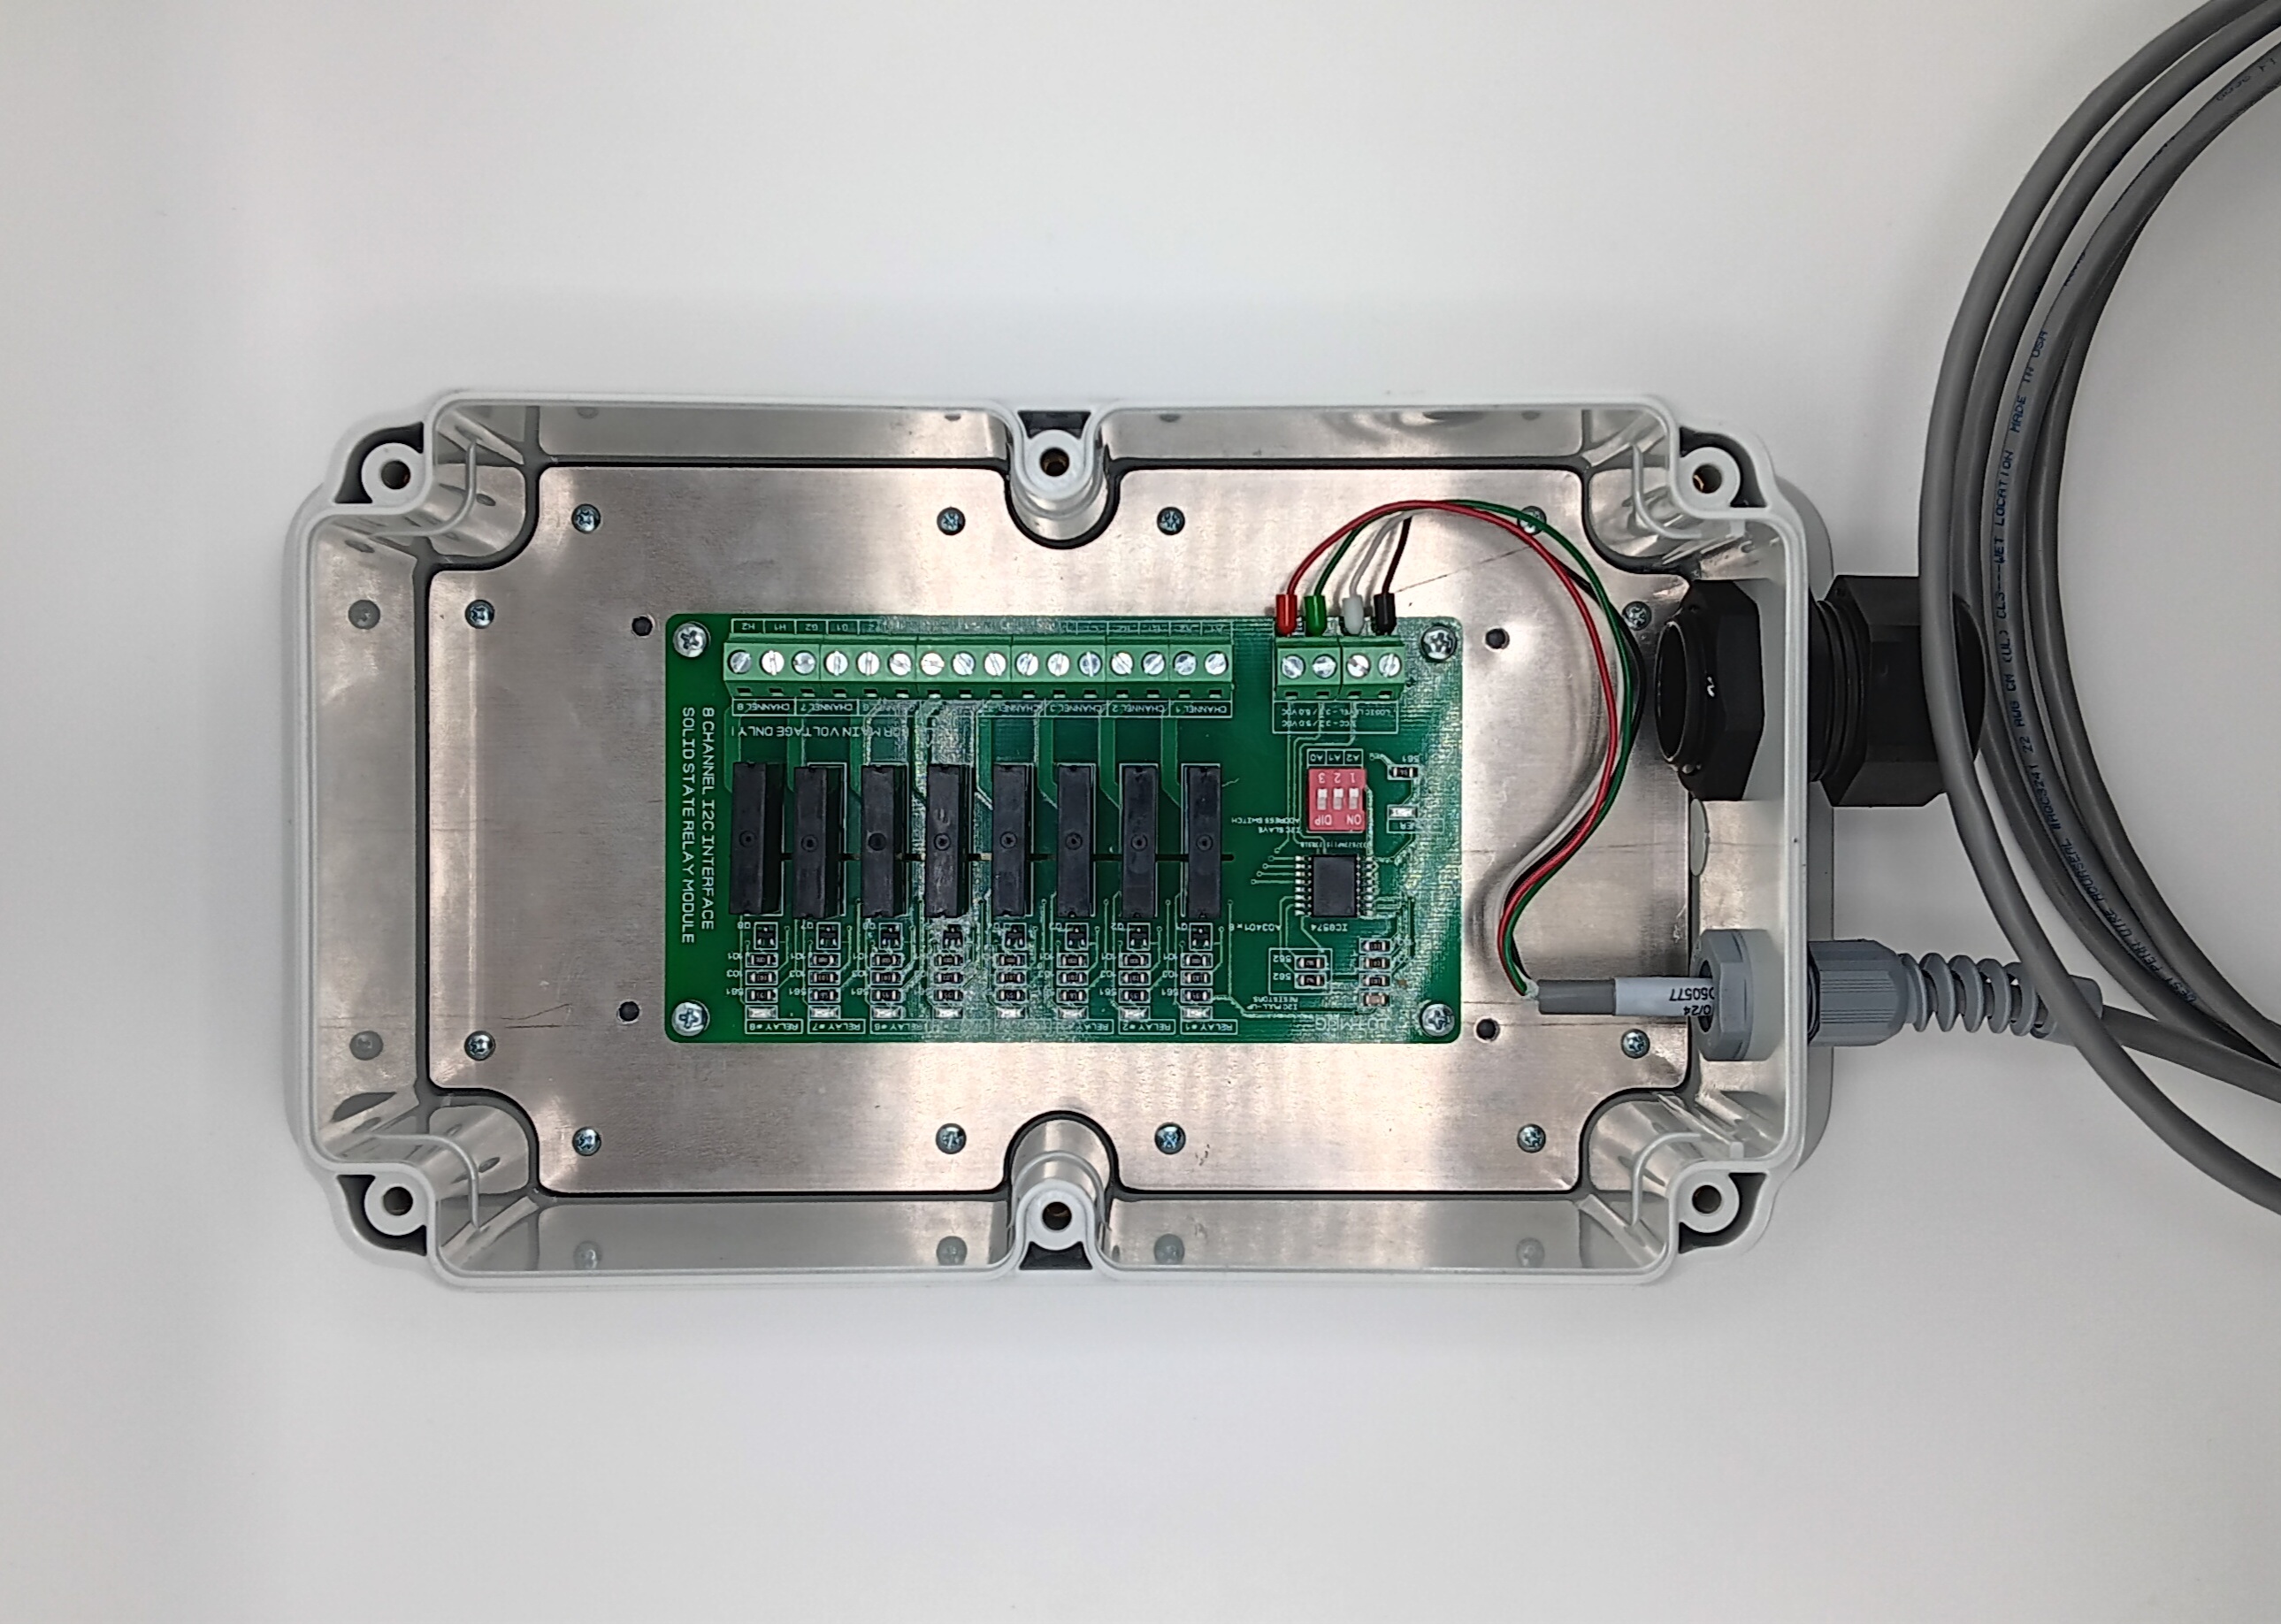
AMN-EXP-RV8 Expansion Board and Enclosure. |
Overview
The AMN-EXP-RV8 expansion connects to the neatMon node to provide AC relay control for direct wiring to 24v AC Irrigation Solenoids, High Voltage control paired with Ice Cube Relays (not included) and other applications.
¶ Getting Started
¶ Installation
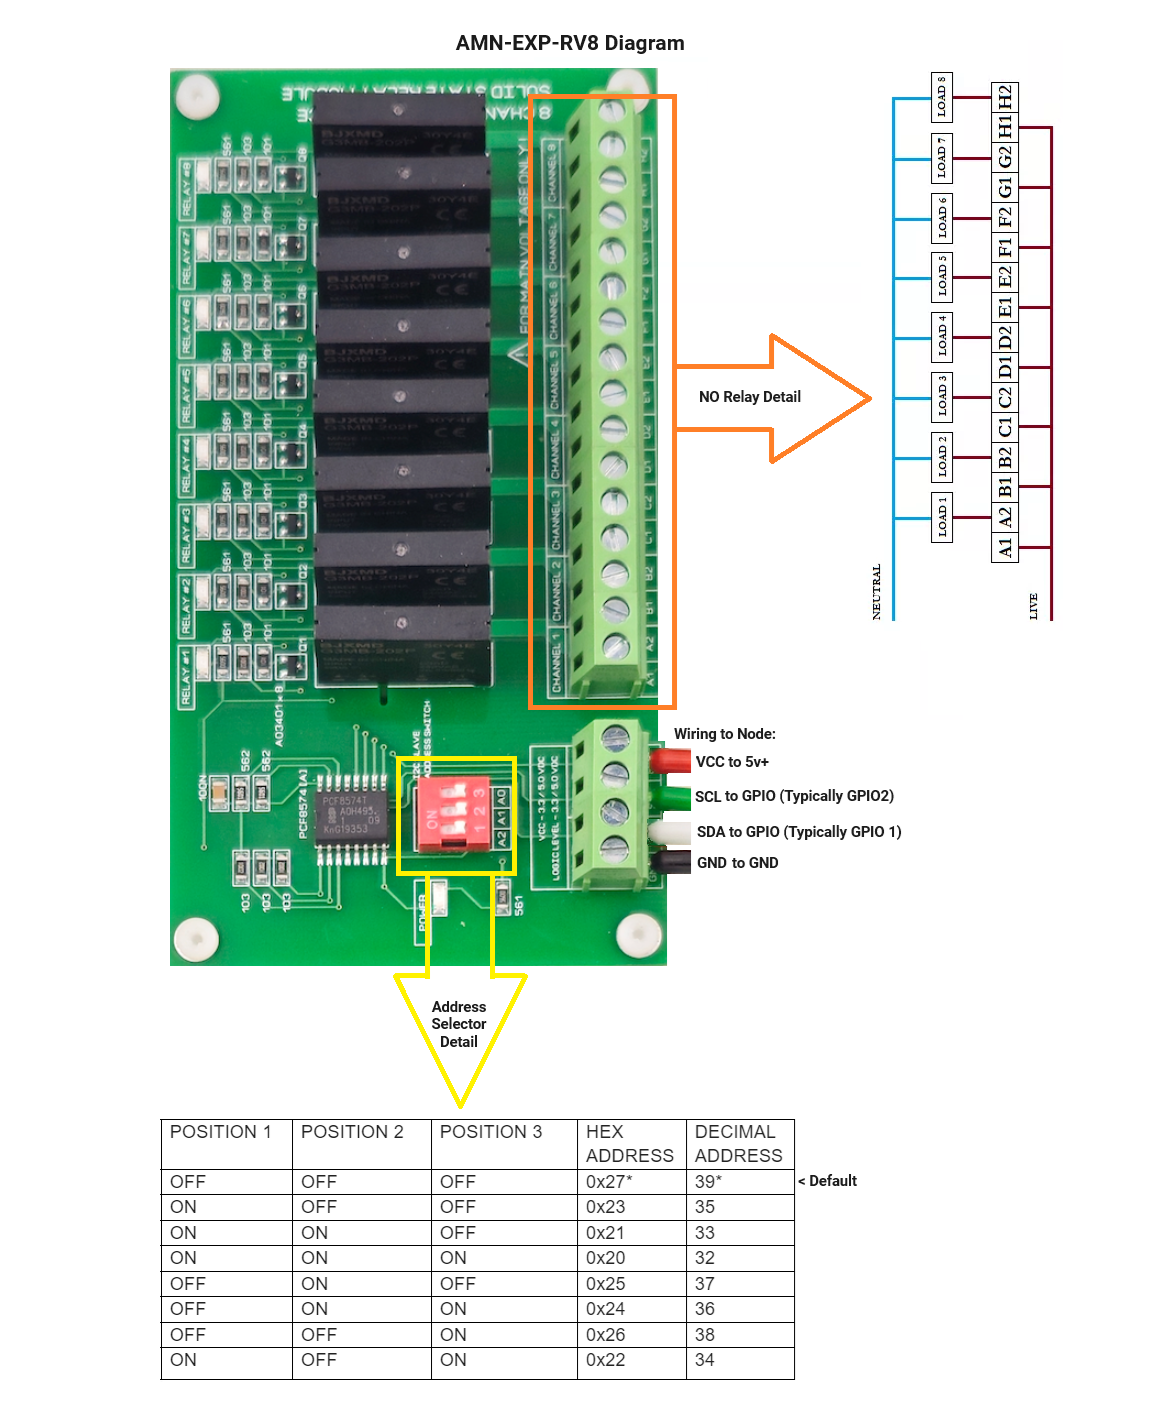
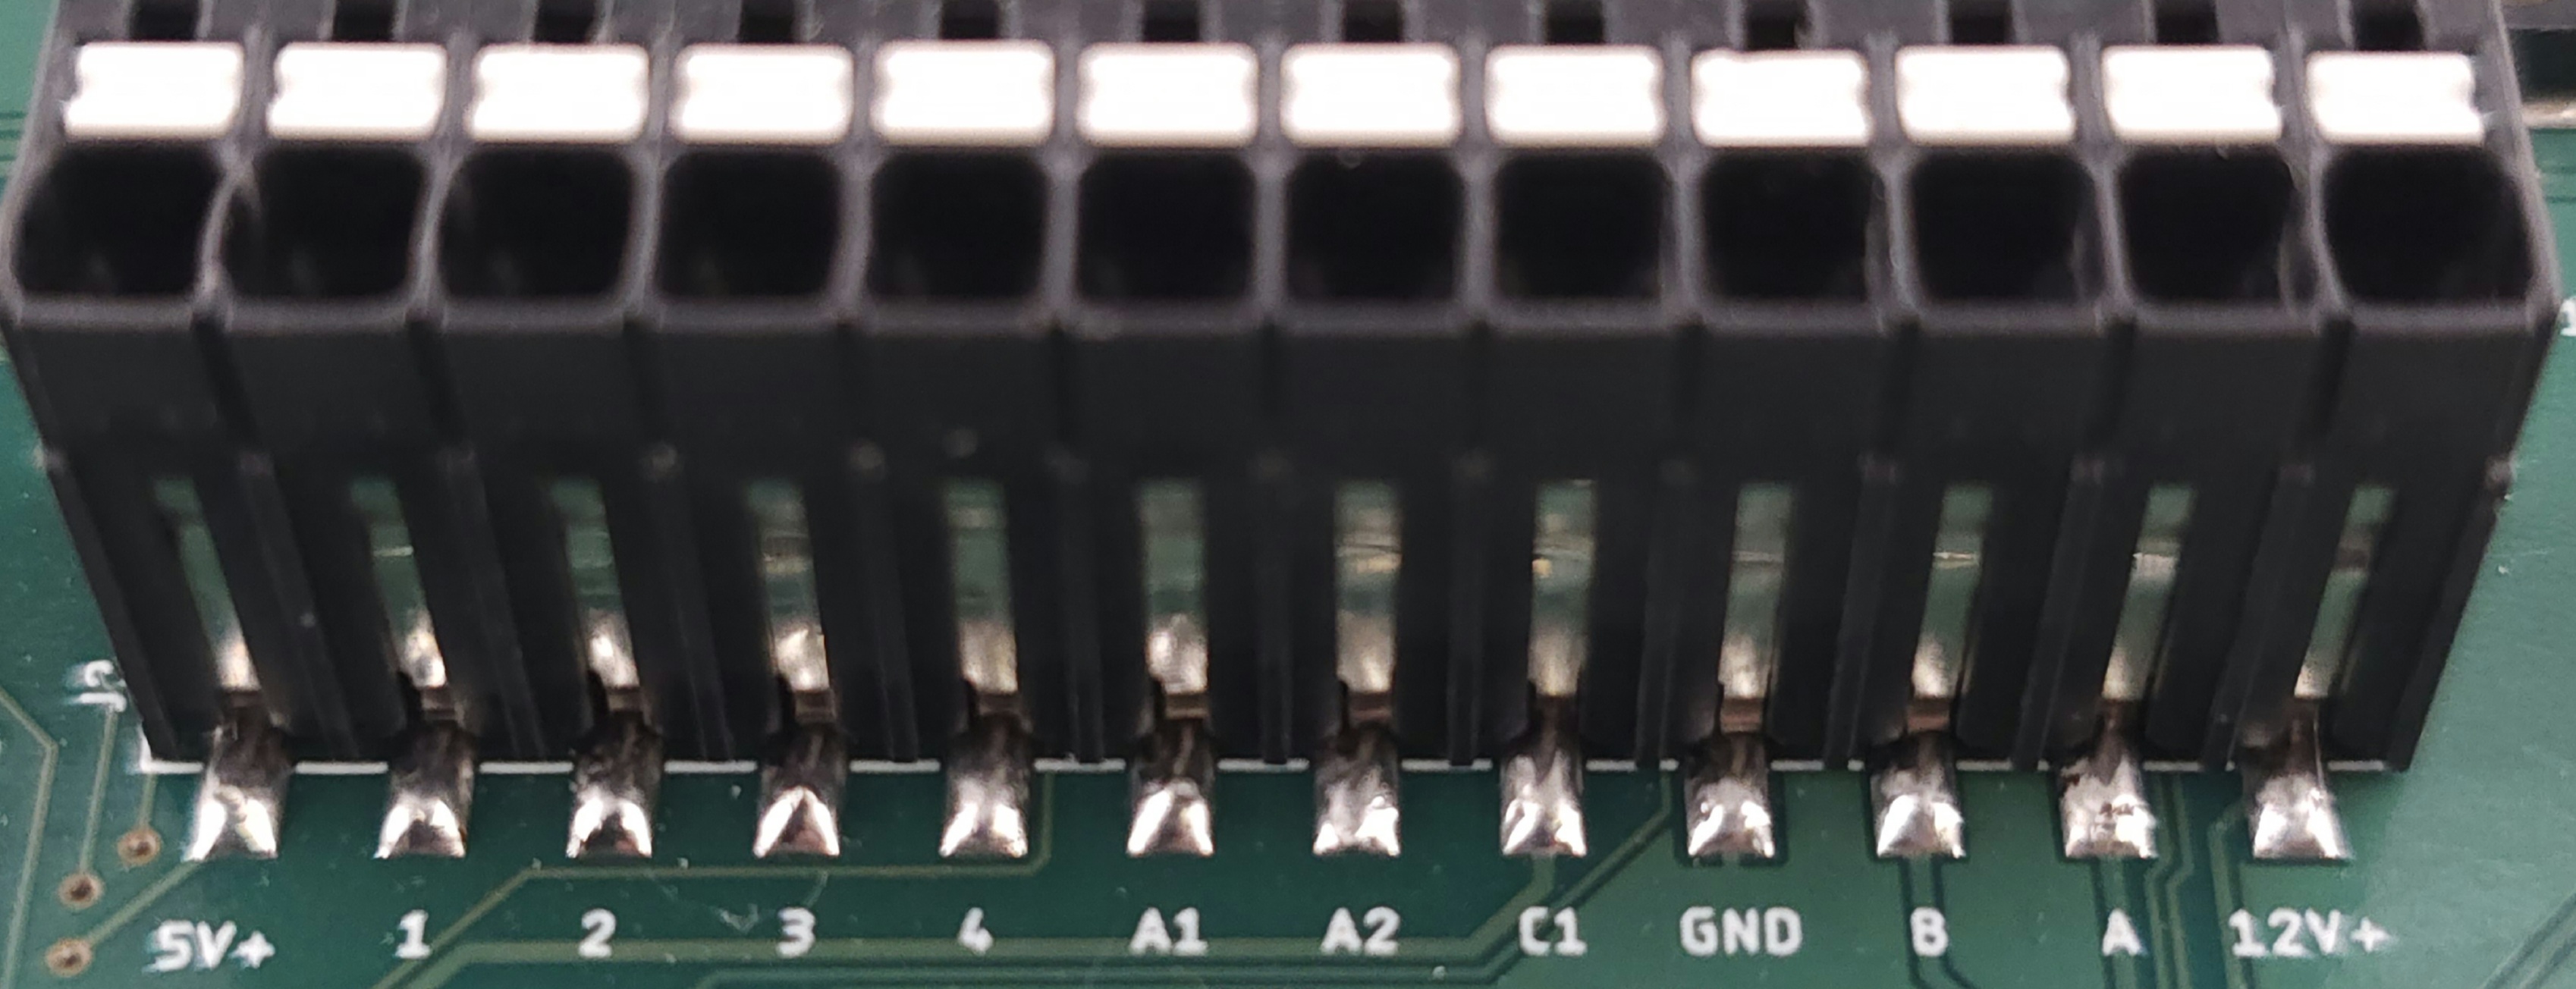
The RV8 station connects to the neatMon Automated Monitoring node via the GPIO, GND, and 5v+ ports.


Note wiring and Address Switch Position Above.
Default Switch Position is all 3 switches in the OFF or Down position.

| 5v+ | GPIO 1 | GPIO 2 | GPIO 3 | GPIO 4 | Analog 1 | Analog 2 | Counter 1 | Ground | RS485 B | RS485 A | 12v+ |
GPIO1 is the default for SDA (Data- White Wire)
GPIO2 is the default for SCL (Clock- Green Wire)
Black wire must be connected to GND
Red wire must be connected to 5v+
NOTE: Minimum 30mA load required to open/close relay. Some solenoids for example may require a 5w resistor in parallel to the load.
¶ Configuration
¶ Get Prompt
First, you will need to open a serial terminal to the AMN and arrive at the neatMon Main Menu. Be sure to disconnect any solar panel or external charger before connecting with USB to avoid back feeding power to your computer.
If you are unsure how to do this check the Opening Serial Terminal guide.
NOTE: Sleep mode1: Light Sleep and Power mode 2: 5v/12v Constant must be selected for RV8 to function. Firmware 2.51 and newer automatically sets the node to Light Sleep and 5v/12v Constant when RV8 is added. For instructions on manually setting Sleep and Power modes, visit the Utility Menu Reference page.
NOTE: Network Sync Rate of 5-10 minutes is recommended for this sensor. To view directions on setting network sync rate, visit the Network Menu Reference page.
neatMon Main Menu
        1: Network Config
        2: Sensor Config
        3: Utilities
        x: < Save & Quit
<2 Select Sensor Config.
¶ Select and Configure Sensor
Sensor Config
        1: Add sensor
        2: Disable Battery monitor
        3: List sensors
        4: Delete sensor
        5: Test read
        x: <Back
<1 Select Add sensor.
Create sensor

Select type:
        1: nM TPRH sensor
        2: nM NCTP sensor
        3: nM GPIO analog (4v max)
        4: nM digital counter
        5: nM air quality monitor
        6: Generic SDI-12 Sensor
        7: Sentek RS485 SM
        8: LeafMon sensor
        9: Next page....

        x: <Back
<9 Select Next page… .
Sensor list continued...

Select type:
        1: nM+ A1/A2 analog (5v max)
        2: Relay Controller - 8 Relay
        3: Relay Controller - RS485
        4: Davis VP2 Weather Station - RS485
        5: High frequency kHz counter
        6: GPIO Pulse counter
        7: Modbus Sensor
        8: HD GPS (ZED-F9P)
        9: Next page....

        x: <Back to Sensor Menu
<2 Select Relay Controller - 8 Relay.
Sensor: Updating power mode to constant 5v/12v
Sensor: Updating sleep mode to light sleep
Enter sample rate (mins): >2In Firmware 251 and newer, the node will be set to light sleep and 5v/12v constant. You can now define how often the sensor will read. 2 minutes is recommended.
Setup controller configuration:
        1: Set controller ID/Address (39)
        2: Set nM hub relay offset (1)
        3: Set port configuration [SCL:2 SDA:1]
        5: Save
        x: <Back

>5Select Save to accept the default configuration. Check that the configuration set here matches your wiring (review suggested wiring in the diagrams above). You will be returned to the Sensor Config page.
Created rel-8[1]


Sensor Config
        1: Add sensor
        2: Disable Battery monitor
        3: List sensors
        4: Delete sensor
        5: Test read sensors
x: <BackThe RV8 has been created. Proceed to Save Configuration below.
¶ Save Configuration
Created rel-8[1]


Sensor Config
        1: Add sensor
        2: Disable Battery monitor
        3: List sensors
        4: Delete sensor
        5: Test read sensors
        x: <Back
>xChoose <Back by pressing x.
Exiting...

neatMon Main Menu
        1: Network Config
        2: Sensor Config
        3: Utilities
        x: < Save & Quit

>x
Quitting...

Memory: Configuration Saved! (Used 1045/4040 bytes)
Resetting node now..Chose < Save & Quit by pressing x.
NOTE: If you don't do this the sensor will not be saved.
--------------------------------------

        Automated Monitoring Node
        by neatMon, Inc.

--------------------------------------

Device Info:
        GUID:           bbda272d-6fb1-358f-d48afcae6794
        P/N:            PLUS
        HW:             1.06
        FW:             2.52
        Modem:          ME910G1


Network Settings:
        Server:         api.neatmon.io
        Path:           /api/device/bbda272d-6fb1-358f-d48afcae6794
        Port:           1330
        Modem FW:       1
        APN network:    vzwinternet
        APN username:
        APN password:
        Reg Type:       LTE
        Sync rate:      5m
        Alert sync rate:5m
        Modem debug:    disabled

General Settings:
        Battery monitor:enabled
        Demo mode:      false
        Num sensors:    1
        Sleep mode:     1
        Power mode:     2

Sensor Definitions/Settings
ID      |       Sensor name
---------------------------------
1       |       rel-8(27)
        Type: rel [11]
        Sample rate (mins): 2
        Interface: I2C
        Port: 1
        Misc:
                Address: 39
                nM Hub Relay Offset: 1 - 8

Press 'C' to stop booting and configure............The node will now reboot and display the sensor(s) configured. Press c to make additional changes. To allow the node initialize into normal operation, do not press anything.
¶ Sample Sensor
¶ Get Prompt
First, you will need to open a serial terminal to the AMN and arrive at the NeatMon Main Menu, or continue on from previous steps. If you are unsure how to do this check the Opening Serial Terminal guide.
Press 'C' to stop booting and configure...........

neatMon Main Menu
        1: Network Config
        2: Sensor Config
        3: Utilities
        x: < Save & Quit
<2 Select Sensor Config.
Sensor Config
		1: Add sensor
		2: Disable Battery monitor
		3: List sensors
		4: Delete sensor
		5: Test read sensors
		x: <Back


>5Select Test read sensors.
ID      |       Sensor name
---------------------------------
0       |       Battery monitor---------------------------------
1       |       rel-8[1]
        Type: rel [11]
        Sample rate (mins): 2
        Interface: I2C
        Port: 1
        Misc:

                Address: 39
                nM Hub Relay Offset: 1 - 8
Enter ID of sensor to read (x to cancel): 1Enter the number of the sensor that should be read. In this example, RV8 is 1.
Power: 3V3_SW power enabled
Power: 12V/5V power enabled
Relay RV-8: Initializing..
Relay RV-8: Initializing ports
Preparing to read Relay 8 expansion controller
I2C Config: [1] SDA(33), SCL(25), State (1/1)

<data omitted>

Read again? Y/nIt will now read the sensor and output the sensor data (data is omitted in this example). Enter Y to read again, or n to exit.
¶ Full Example
NOTE: This example assumes the node is a PLUS node, HW Version 1.06 using a C-Modem with Verizon Wireless and is sending data to the neatMon hub. These settings must be correct for the node to function.
For other modem/network/API configurations, please refer to the Network Menu Reference.
For instructions on configuring P/N, HW Version, and other settings, please refer to the Utility Menu Reference.
--------------------------------------

        Automated Monitoring Node
        by neatMon, Inc.

--------------------------------------

Device Info:
        GUID:           bbda272d-6fb1-358f-d48afcae6794
        P/N:            PLUS
        HW:             1.06
        FW:             2.52
        Modem:          ME910G1


Network Settings:
        Server:         api.neatmon.io
        Path:           /api/device/bbda272d-6fb1-358f-d48afcae6794
        Port:           1330
        Modem FW:       1
        APN network:    vzwinternet
        APN username:
        APN password:
        Reg Type:       LTE
        Sync rate:      15m
        Alert sync rate:5m
        Modem debug:    disabled

General Settings:
        Battery monitor:enabled
        Demo mode:      false
        Num sensors:    0
        Sleep mode:     3
        Power mode:     0

Sensor Definitions/Settings: no sensors configured

Press 'C' to stop booting and configure.........

neatMon Main Menu
        1: Network Config
        2: Sensor Config
        3: Utilities
        x: < Save Config & Quit

>1

Network Config
        1: HTTP Server: "api.neatmon.io"
        2: HTTP Path: "/api/device/bbda272d-6fb1-358f-d48afcae6794"
        3: HTTP Port: 1330
        4: API Setup
        5: Sync rate: 15m
        6: APN Network: "vzwinternet"
        7: APN Username: ""
        8: APN Password: ""
        9: Next page....
        x: <Back

>5
Type new server sync rate (mins): 5

Network Config
        1: HTTP Server: "api.neatmon.io"
        2: HTTP Path: "/api/device/bbda272d-6fb1-358f-d48afcae6794"
        3: HTTP Port: 1330
        4: API Setup
        5: Sync rate: 5m
        6: APN Network: "vzwinternet"
        7: APN Username: ""
        8: APN Password: ""
        9: Next page....
        x: <Back

>x
Exiting...

neatMon Main Menu
        1: Network Config
        2: Sensor Config
        3: Utilities
        x: < Save Config & Quit

>2

Sensor Config
        1: Add sensor
        2: Disable Battery monitor
        3: List sensors
        4: Delete sensor
        5: Test read sensors
        x: <Back

>1


Create sensor

Select type:
        1: nM TPRH sensor
        2: nM NCTP sensor
        3: nM GPIO analog (4v max)
        4: nM digital counter
        5: nM air quality monitor
        6: Generic SDI-12 Sensor
        7: Sentek RS485 SM
        8: LeafMon sensor
        9: Next page....

        x: <Back

>9


Sensor list continued...

Select type:
        1: nM+ A1/A2 analog (5v max)
        2: Relay Controller - 8 Relay
        3: Relay Controller - RS485
        4: Davis VP2 Weather Station - RS485
        5: High frequency kHz counter
        6: GPIO Pulse counter
        7: Modbus Sensor
        8: HD GPS (ZED-F9P)
        9: Next page....

        x: <Back to Sensor Menu

>2
Sensor: Updating power mode to constant 5v/12v
Sensor: Updating sleep mode to light sleep
Enter sample rate (mins): >2
Setup controller configuration:
        1: Set controller ID/Address (39)
        2: Set nM hub relay offset (1)
        3: Set port configuration [SCL:2 SDA:1]
        5: Save
        x: <Back

>5

Created rel-8[1]

Sensor Config
        1: Add sensor
        2: Disable Battery monitor
        3: List sensors
        4: Delete sensor
        5: Test read sensors
        x: <Back

>x
Exiting...

neatMon Main Menu
        1: Network Config
        2: Sensor Config
        3: Utilities
        x: < Save Config & Quit

>x
Quitting...

Memory: Configuration Saved! (Used 1016/4040 bytes)
Resetting node now..
ets Jul 29 2019 12:21:46

rst:0xc (SW_CPU_RESET),boot:0x13 (SPI_FAST_FLASH_BOOT)
configsip: 0, SPIWP:0xee
clk_drv:0x00,q_drv:0x00,d_drv:0x00,cs0_drv:0x00,hd_drv:0x00,wp_drv:0x00
mode:DIO, clock div:2
load:0x3fff0030,len:1184
load:0x40078000,len:13232
load:0x40080400,len:3028
entry 0x400805e4

--------------------------------------

        Automated Monitoring Node
        by neatMon, Inc.

--------------------------------------

Device Info:
        GUID:           bbda272d-6fb1-358f-d48afcae6794
        P/N:            PLUS
        HW:             1.06
        FW:             2.52
        Modem:          ME910G1

Network Settings:
        Server:         api.neatmon.io
        Path:           /api/device/bbda272d-6fb1-358f-d48afcae6794
        Port:           1330
        Modem FW:       1
        APN network:    vzwinternet
        APN username:
        APN password:
        Reg Type:       LTE
        Sync rate:      5m
        Alert sync rate:5m
        Modem debug:    disabled

General Settings:
        Battery monitor:enabled
        Demo mode:      false
        Num sensors:    1
        Sleep mode:     1
        Power mode:     2

Sensor Definitions/Settings
ID      |       Sensor name
---------------------------------
1       |       rel-8(27)
        Type: rel [11]
        Sample rate (mins): 2
        Interface: I2C
        Port: 1
        Misc:
                Address: 39
                nM Hub Relay Offset: 1 - 8

Press 'C' to stop booting and configure............¶ Deployment
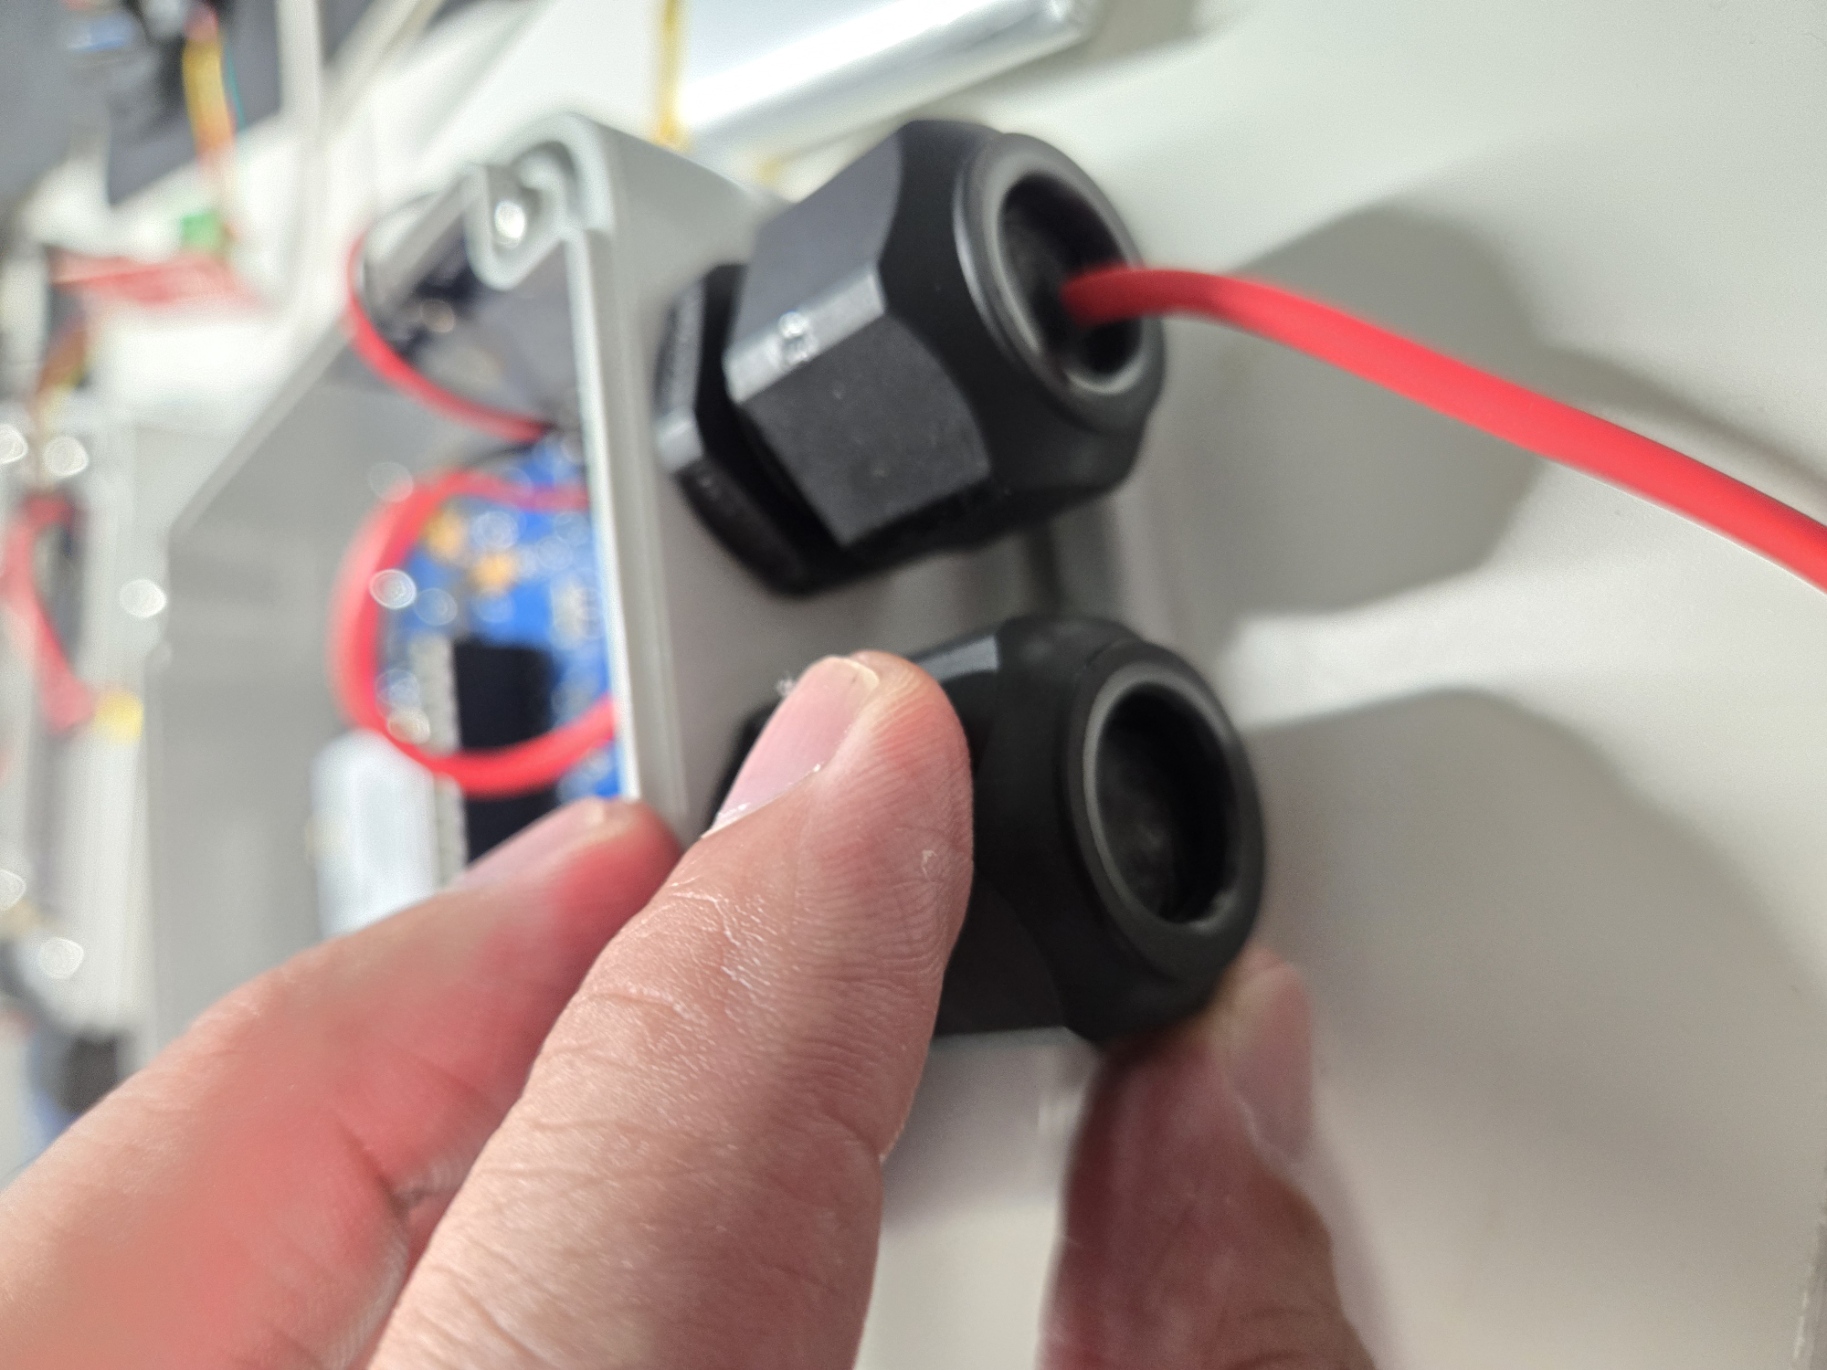
When deployed, the cable from the sensor should not be kinked or pinched, a gentle sweep is recommended.
It is recommended to add a loose service loop between the AMN and the RV8 in the event that the cable is incidentally pulled on.